The belt, tensioner, and pulleys should be treated as one system
- On most UK cars, the part in question is the auxiliary or serpentine belt, not the cambelt.
- Squealing, cracking, glazing, frayed edges, rubber dust, or warning lights are the signs I would not ignore.
- A straightforward belt change usually means releasing tension, removing the old belt, checking the pulleys, and routing the new one exactly the same way.
- In the UK, a simple garage job often sits around £80 to £120, but worn pulleys or a tighter engine layout can push that higher.
- If the belt is shredded, missing, or soaked in oil, I would stop driving and arrange recovery rather than trying to nurse it home.
What the belt does and why failure matters
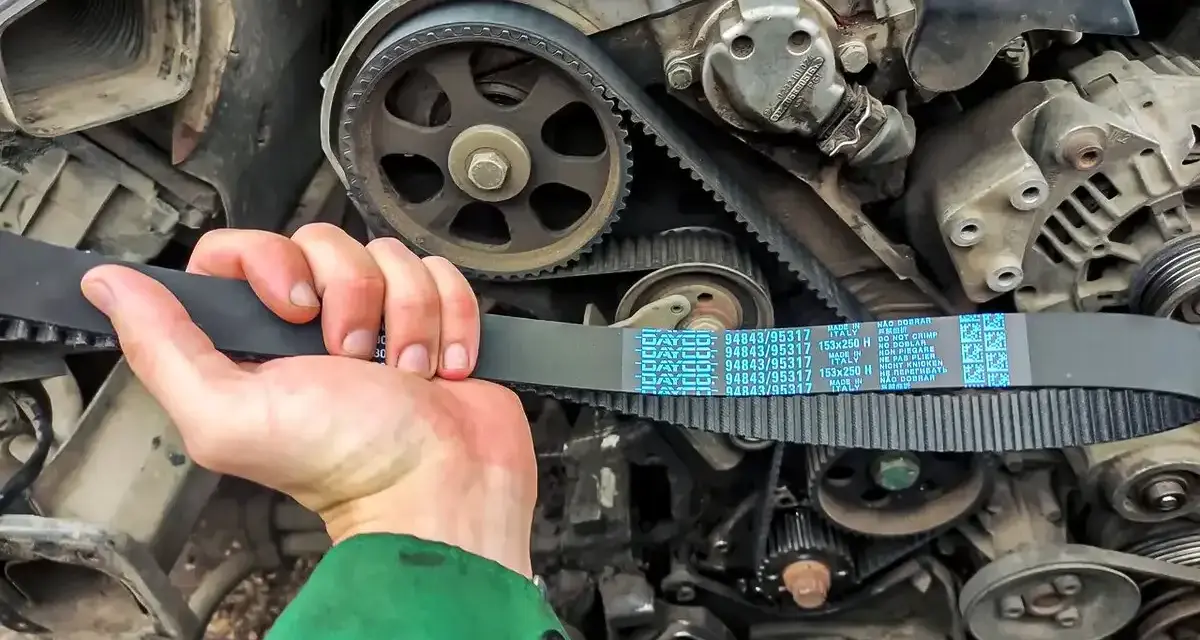
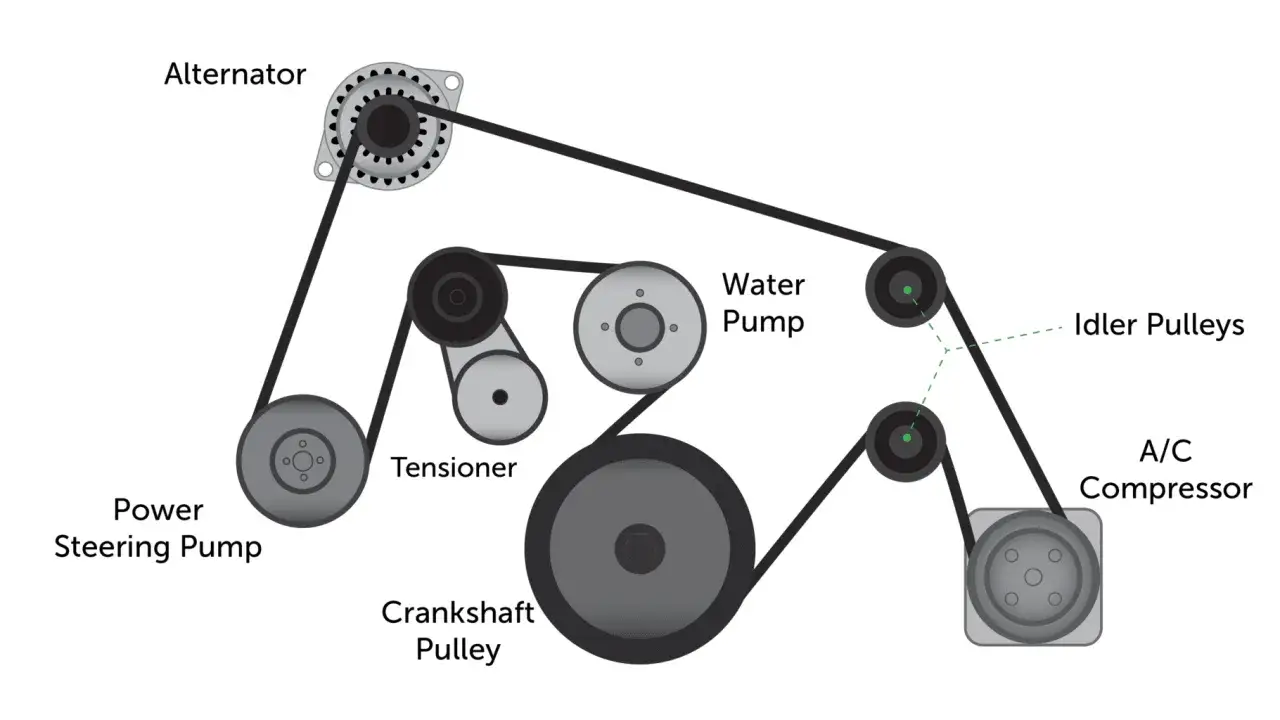
The belt at the front of the engine drives the accessories that make the car usable day to day. On many vehicles it powers the alternator, air-con compressor, power steering pump, and sometimes the water pump, which is why a failure can feel minor at first and then escalate fast. I also separate this from the cambelt: the auxiliary belt runs ancillaries, while the timing belt keeps the engine timed correctly. They are different jobs, different risks, and different repair logic.
The reason this matters is simple. A belt can look cheap and unimportant, yet it keeps charging, cooling, and steering support working in the background. If it slips, degrades, or snaps, the engine may still run briefly, but the car can become unsafe or undriveable very quickly. That is why I pay attention to belt noise and condition long before the belt actually fails, because the early warnings are usually there.
That leads straight into timing: when should it be changed before it becomes a problem?
When I would plan the replacement
There is no single mileage rule that fits every car. A belt might last a long time on one engine and wear out much sooner on another because of heat, routing, load, or access. In practice, I would follow the manufacturer schedule first, then use the car’s condition and service history to decide whether the belt should be replaced sooner.
As a practical rule, I start thinking seriously about replacement when any of these apply:
- The belt is near the age or mileage limit in the service schedule.
- The car has repeated squealing on start-up or under accessory load.
- The ribs show cracking, glazing, fraying, or missing chunks.
- The belt has been contaminated by oil, coolant, or power steering fluid.
- The engine bay is already open for related work and the belt is due soon anyway.
I would not wait for a noisy belt to become a broken one. If the belt system is already old, the sensible move is to replace it before it strands you, and that naturally raises the question of what the warning signs actually look like.
The signs I would not ignore
Most belt problems announce themselves before they become breakdowns. The mistake I see most often is assuming every squeal is “just the belt” when the tensioner or an idler pulley may be the real culprit. I listen for noise, but I also inspect the belt and the surrounding hardware because the system fails as a unit.
| Symptom | What it usually suggests | How urgent it is |
|---|---|---|
| High-pitched squeal on cold start or when loads switch on | Belt slip, weak tensioner, or pulley wear | Inspect soon |
| Cracks across the ribs, frayed edges, or glazed shiny surfaces | Normal ageing has moved into replacement territory | Replace at the next service, sooner if the belt is old |
| Black rubber dust around the front of the engine | Misalignment, pulley wear, or belt breakdown | Inspect now |
| Battery light, weak charging, or heavy steering | The belt may have slipped or failed | Stop and investigate immediately |
| Burning rubber smell or chirping noise | Heat, slip, or a bearing that is starting to seize | Do not ignore it |
If the belt has only gone noisy, the repair may still be simple. If the belt has shredded or the accessory drive is full of dust and heat damage, I treat it as a proper system inspection rather than a quick parts swap.
How the belt change actually works
On a straightforward engine with an automatic tensioner, the job is mostly about access, routing, and restraint. The exact layout varies from car to car, which is why I always start with the belt path before touching anything. On some engines the belt is easy to reach from the front of the car; on others, access comes through the wheel arch, splash guard, or a lifted vehicle.
- Confirm the belt route and take a photo before removal so the new belt goes back on exactly the same way.
- Release the tensioner carefully to remove load from the belt.
- Slip the old belt off the pulleys once the tension is off.
- Inspect the tensioner, idlers, and visible pulley faces for roughness, play, or misalignment.
- Fit the new belt along the same path, making sure every rib sits fully in its groove.
- Reset or release the tensioner so the belt is held at the correct tension.
- Turn the engine by hand or run it briefly and check that the belt tracks cleanly.
There are two important variants that change the job. Some cars use a stretch-fit belt, which is installed with a specific tool and is not meant to be refitted. Others have tight packaging where the belt itself is cheap, but the labour is not, because half the front of the car has to come apart to reach it. That is why the engine layout matters as much as the belt part number.
Once the belt is off, I always use the opportunity to inspect the rest of the drive system, because a fresh belt on a failing pulley is a false economy.
What I would replace at the same time
I like to be system-smart here. If the belt has aged, the tensioner and idler bearings are often not far behind, and replacing only the visible belt can leave the real noise or wear source behind. That is why many repair kits now bundle the belt with the hardware that keeps it aligned and properly tensioned.
| Part | When it makes sense to change it | Why it matters |
|---|---|---|
| Belt only | The old belt is worn, but the pulleys spin smoothly and the tensioner feels solid | Cheapest option, but only if the rest of the system is healthy |
| Belt plus tensioner | The tensioner is weak, noisy, or bouncing | Prevents repeat squeal and reduces the risk of the new belt being overloaded |
| Belt plus idler pulley | The pulley feels rough, wobbles, or makes bearing noise | A noisy pulley can destroy a good belt surprisingly quickly |
| Full belt kit | High mileage, poor access, or an engine where labour dominates the job | Usually the best value when the front of the engine is already exposed |
| Water pump, if this engine uses the belt to drive it | The pump is accessible through the same repair path or already showing signs of wear | Worth doing while access is open, but only on engines where that makes mechanical sense |
If there is one thing I would avoid, it is fitting a new belt onto dirty, misaligned, or noisy hardware and hoping for the best. The belt is only as good as the components guiding it, which is exactly why the price of the job varies so much.
What the job costs in the UK
For a straightforward auxiliary belt swap in the UK, I would expect an independent garage to sit roughly in the £80 to £120 range. Once the layout gets tighter, the car is premium or performance-focused, or the repair includes a tensioner or idler pulley, the total can move into the £120 to £250+ bracket. That spread is normal because the parts are not the whole story here; access and hardware condition change the labour significantly.
| Typical UK scenario | Expected range | What pushes the price up |
|---|---|---|
| Simple belt-only swap on an accessible engine | £80 to £120 | Basic labour, standard belt, limited strip-down |
| Belt plus one worn pulley or tensioner | £120 to £180 | Extra parts, extra labour, more time checking alignment |
| Tight engine bay, premium model, or stretch-fit belt | £170 to £250+ | Poor access, specialist tools, more dismantling |
| Main dealer pricing on a complex car | Often above independent rates | Dealer labour rates and branded parts |
From a value perspective, I would rather pay a little more for the right hardware than pay twice for a belt that was installed into a tired tensioner. That brings me to the question many owners ask next: is this realistic to do at home, or is it better left to a garage?
DIY or garage work
I only recommend a driveway job when the layout is clear, the tensioner is straightforward, and the owner is comfortable working safely around the front of the engine. If the belt is easy to access and the routing is obvious, the task can be manageable with the right tools and patience. If the engine bay is cramped, the belt is a stretch-fit design, or there is any sign of pulley wear, I would send it to a garage.
- DIY makes sense when the belt path is visible, the tensioner is automatic and simple, and you can document the routing before removal.
- DIY becomes risky when the belt also drives critical accessories, the hardware is corroded, or access requires removing wheelarch liners and undertrays.
- A garage is the better choice when you want the tensioner, idlers, and belt checked as a set rather than guessing at one noisy component.
- Recovery is the safer move if the belt has failed completely, because a broken belt can also leave you with a dead battery, heavy steering, or overheating.
My rule is simple: if the job depends on feel rather than clear visibility, I stop treating it like a casual maintenance task. Once the new belt is on, the final checks matter just as much as the fitting itself.
The checks I would make after fitting a new belt
A new belt should run quietly and stay centred on the pulleys. I never walk away after the last bolt is tightened; I let the engine idle, listen for chirping or squeal, and watch the belt track across the pulleys. If anything looks off, I stop and recheck the routing before the belt takes a set in the wrong position.
After installation, I would confirm the following:
- The belt sits fully in every pulley groove.
- The tensioner is holding steady and not bouncing excessively.
- No accessory is squealing, wobbling, or running hot.
- The battery light stays off and the charging system behaves normally.
- There is no fresh rubber dust, burning smell, or edge wear after a short test drive.
If the belt starts noisy again within days, I would not blame the new belt first. I would suspect the routing, a weak tensioner, a rough pulley, or contamination from another engine problem. The smallest leak or bearing fault can undo an otherwise correct repair, which is why I always treat the job as a check of the whole front-end drive system rather than a single part.
The maintenance habit that keeps the belt system quiet
The easiest way to avoid drama is to inspect the belt system before it becomes a problem. I look at it during annual servicing, listen for cold-start squeal, and treat any oil leak near the front of the engine as belt-related until proven otherwise. If the belt is due soon, the tensioner is noisy, or the pulleys feel rough, I replace the weak link before it turns into a roadside fault.
That is the practical takeaway: the belt itself is only part of the job. A clean, correctly routed belt, a healthy tensioner, and quiet pulleys are what keep the accessory drive reliable, and that is the standard I would aim for every time.