A car thermostat replacement is one of those cooling-system jobs that can look simple on paper and become frustrating if you skip the diagnosis or rush the refill. I’m going to cover how to tell the thermostat is really the problem, what to prepare, the replacement steps themselves, and the part most people underestimate: bleeding the system properly afterwards. I’ll also put the repair into a UK cost context, because on many cars the labour matters more than the part.
The main things to get right before and after the job
- Confirm the fault first, because overheating, weak cabin heat, and a wandering gauge can also point to coolant loss, air in the system, or a failing water pump.
- Let the engine go fully cold before opening the cooling system; hot coolant can still be under pressure and can scald badly.
- Drain only enough coolant to drop the level below the thermostat housing, unless your car’s layout requires a full drain.
- Replace the gasket or O-ring, clean the mating surfaces, and tighten the housing to the correct torque spec.
- Bleed the system carefully after refilling, because trapped air can mimic a bad thermostat and bring the overheating back.
- Budget realistically in the UK: an accessible DIY job can be inexpensive, but awkward engine layouts and integrated housings quickly push the price up.
How I decide whether the thermostat is really at fault
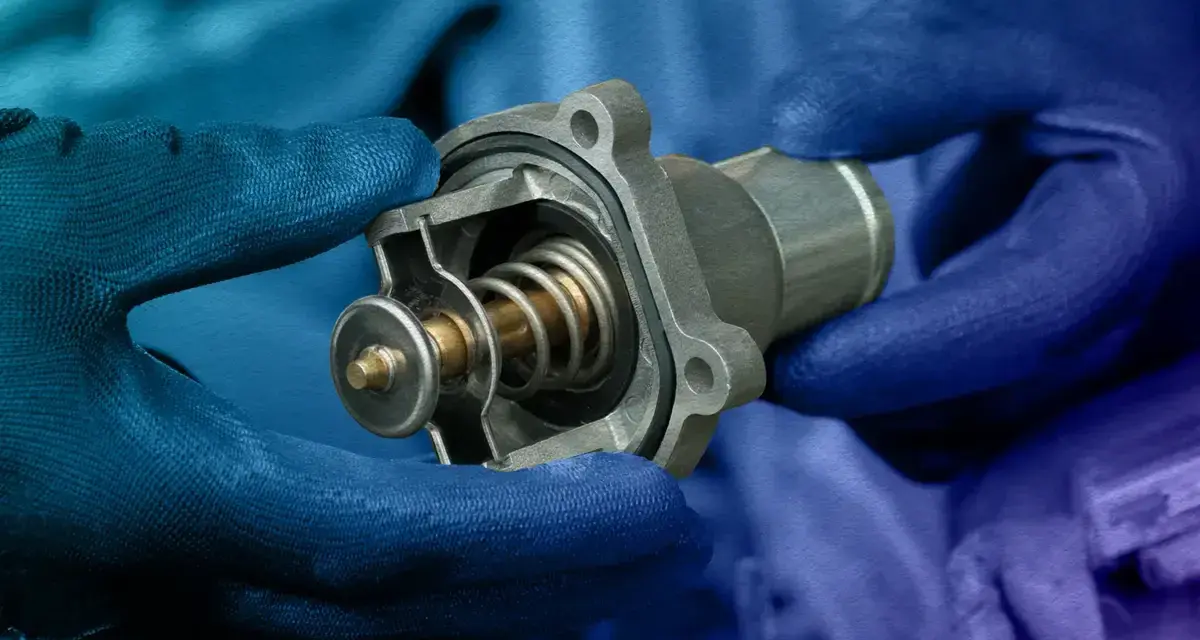
The thermostat is a temperature-controlled valve, usually built around a wax element that expands as the engine warms up. When it fails, the symptoms often overlap with other cooling faults, so I never blame it blindly. The job becomes much easier when the signs line up instead of guessing from one hot gauge reading.
| What you notice | What it often means | Why the thermostat stays on the shortlist |
|---|---|---|
| Engine overheats quickly, upper hose stays cool for too long | Thermostat stuck closed or an air lock | Coolant is not reaching the radiator when it should |
| Engine runs too cool, heater is weak, fuel use seems worse | Thermostat stuck open | The engine never reaches and holds normal operating temperature |
| Temperature gauge moves up and down instead of settling | Thermostat sticking, low coolant, or trapped air | Intermittent flow control usually shows up as unstable temperature |
| Coolant leak around the housing after recent work | Failing gasket, O-ring, or cracked plastic housing | The thermostat itself may be fine, but the seal is not |
I also look at heater performance because cabin heat is a simple clue. If the engine is genuinely warm but the heater still blows lukewarm air, I start thinking about coolant level, air in the system, or a thermostat that is not opening properly. If the engine is overheating and the heater goes cold at the same time, that is even more suspicious. Once those symptoms make sense together, the next step is getting the right parts and tools before touching a bolt.
What to gather before starting the job
The actual thermostat is usually not the expensive part. The cost comes from access, coolant, and the time spent cleaning and refilling the system without leaving air pockets behind. I always check whether the car uses a separate thermostat insert or a combined thermostat housing, because many modern engines replace the whole assembly rather than a loose valve.
- New thermostat matched to the engine code or VIN, not just the model name.
- Gasket or O-ring, which is the rubber or paper seal that keeps the housing from leaking.
- Correct coolant for the vehicle. I avoid mixing different coolant chemistries unless the handbook says it is safe.
- Drain pan and rags, because even a partial drain makes a mess.
- Socket set and extensions, plus hose clamp pliers if the clips are awkward.
- Torque wrench, because overtightening a plastic housing can crack it.
- Gasket scraper or plastic blade for cleaning old seal material off the mating face.
- Bleed equipment if your car uses bleed screws or a vacuum-fill tool.
Two details save a lot of grief. First, do not open the cap when the engine is hot. Second, plan where the old coolant will go; in the UK, I would take it to a recycling centre or a garage that accepts waste fluids rather than pouring it away. With that prep done, the actual swap is mostly careful, mechanical work rather than guesswork.
The replacement process from drain to refill
The exact layout varies by make and engine, but the basic pattern is the same. Some cars expose the thermostat housing clearly from the top of the engine bay; others bury it under intake pipes, airboxes, battery trays, or coolant hoses. On awkward engines, the part swap is only a small slice of the job.
- Let the engine cool completely, then remove the cap only when there is no pressure left in the system.
- Drain enough coolant so the level sits below the thermostat housing. On many cars, you do not need a full flush for this step.
- Remove any intake ducting, engine covers, or hose clamps blocking access.
- Detach the hose and unbolt the thermostat housing carefully.
- Lift out the old thermostat and note its orientation. The spring side usually faces the engine, but I still check the service data because some engines are different.
- Clean the housing and engine face until both are flat and free of old sealant or corrosion.
- Install the new thermostat, fit the new gasket or O-ring, and reassemble the housing to the correct torque spec.
- Refill with the correct coolant mix and check for immediate leaks before moving on to bleeding.
Two mistakes show up again and again. The first is installing the thermostat the wrong way round, which can stop it from opening correctly. The second is reusing a flattened seal, which turns a simple job into a drip you have to revisit later. Once the mechanical part is done, the real test is whether the cooling system is free of air.
How to bleed the system without chasing an air lock
An air lock is a pocket of trapped air that blocks coolant flow. It can make a brand-new thermostat look faulty because the engine still overheats, the heater stays cold, or the gauge behaves oddly. I treat bleeding as part of the repair, not an optional clean-up step.
- Set the heater to full hot so coolant can circulate through the heater circuit.
- Use the bleed screw if the car has one; it is a small valve designed to release trapped air.
- Top the expansion tank up gradually instead of filling it once and walking away.
- Start the engine and watch the coolant level and gauge as it warms up.
- Check for bubbles, which can be normal at first but should settle as the air escapes.
- Recheck the level after the engine cools fully, then top up to the marked line.
Some newer cars are more demanding here. If the system has multiple bleed points, electric coolant valves, or a vacuum-fill procedure, I would follow the workshop method instead of improvising. A vacuum fill is simply a tool-assisted way of removing air before new coolant goes in, and it can save a lot of trouble on modern engines with complex coolant paths. Once the system is stable, the next question is whether the price still makes sense as a DIY job or a workshop repair.
What the job usually costs in the UK
I would budget differently depending on access. The thermostat itself is often modestly priced, but labour rises sharply when the part is buried under other components or when the housing is part of the assembly. That is why one car can be cheap to fix and another can feel disproportionate for a small valve.
| Scenario | Typical UK budget | What drives the price |
|---|---|---|
| Accessible DIY repair | £30-£90 | Thermostat, gasket, and top-up coolant on a simple layout |
| DIY with housing replacement | £70-£180 | Integrated plastic housing, extra coolant, and more cleaning time |
| Independent garage | £95-£215 | Labour, correct coolant, bleed procedure, and occasional hidden access work |
| Dealer or difficult engine bay | £180-£400+ | Cramped layout, manufacturer parts, or extra disassembly to reach the housing |
Those numbers are planning figures, not a quote for every car. In practice, the biggest cost driver is not the thermostat blade itself; it is whether the engine lets you reach it without stripping half the front end. That is also why I would stop and hand the job over sooner on some cars than on others.
When I would stop and let a garage handle it
I am comfortable with the repair on a straightforward engine, but there are clear cases where I would choose a workshop. That is not about being cautious for its own sake; it is about avoiding a half-finished job that becomes more expensive than the original problem.
- The thermostat sits behind the intake manifold, timing cover, or a stack of brittle plastic parts.
- The housing is cracked, seized, or made of old plastic that could break during removal.
- The car needs a vacuum-fill or a very specific bleeding routine.
- The engine has already overheated badly and there is a chance of secondary damage.
- The coolant keeps disappearing even after the thermostat and seals are replaced.
If the temperature still runs high after the new part goes in, I do not keep changing parts at random. At that point I would look at the radiator cap, hose condition, water pump, blocked radiator, or signs of combustion gases in the coolant. A thermostat fault can be the first visible symptom, but it is not always the whole story. The final checks are what tell you whether the repair really held.
The checks I would make after the new thermostat is in place
After the first warm-up, I want three things: a steady temperature gauge, a heater that produces normal heat, and no leaks around the housing or hose joints. I also recheck the coolant level after the car cools overnight, because the level often drops a little once the last air escapes. That second check is cheap insurance against a repeat overheating complaint.
On the road, a successful repair usually feels boring, and that is exactly what I want. The engine should warm up at a normal pace, settle into its operating range, and stay there instead of oscillating. If the cooling fan cycles more often than expected, the gauge climbs in traffic, or you still get strange heat/cold swings from the heater, I would revisit the diagnosis rather than assume the new thermostat is bad. In other words, the best result is the one you stop noticing because the cooling system has gone back to doing its job quietly.