A radiator flush sounds simple, but the details matter: the system is pressurised, coolant chemistry is sensitive, and trapped air can bring the overheating problem back a day later. This guide explains how to flush a radiator safely, what to prepare, how to rinse the cooling system properly, and when a flush is not the right fix. I’m also covering the checks I would make after refilling so the engine, heater, and cooling fans all behave normally.
The safest flush is the one that fully drains, rinses clean, and leaves no air behind
- Use a flush when coolant is dirty, rusty, contaminated, or overdue by the service schedule.
- Work with a cold engine, the correct coolant spec, and distilled or deionised water for rinsing and mixing.
- Do not open the cap on a hot system, and do not pour used coolant down a drain.
- Bleed the system carefully after refilling, or the engine can still overheat.
- If the coolant looks oily, milky, or heavily sludged, diagnose the fault before repeating the flush.
When a flush is actually worth doing
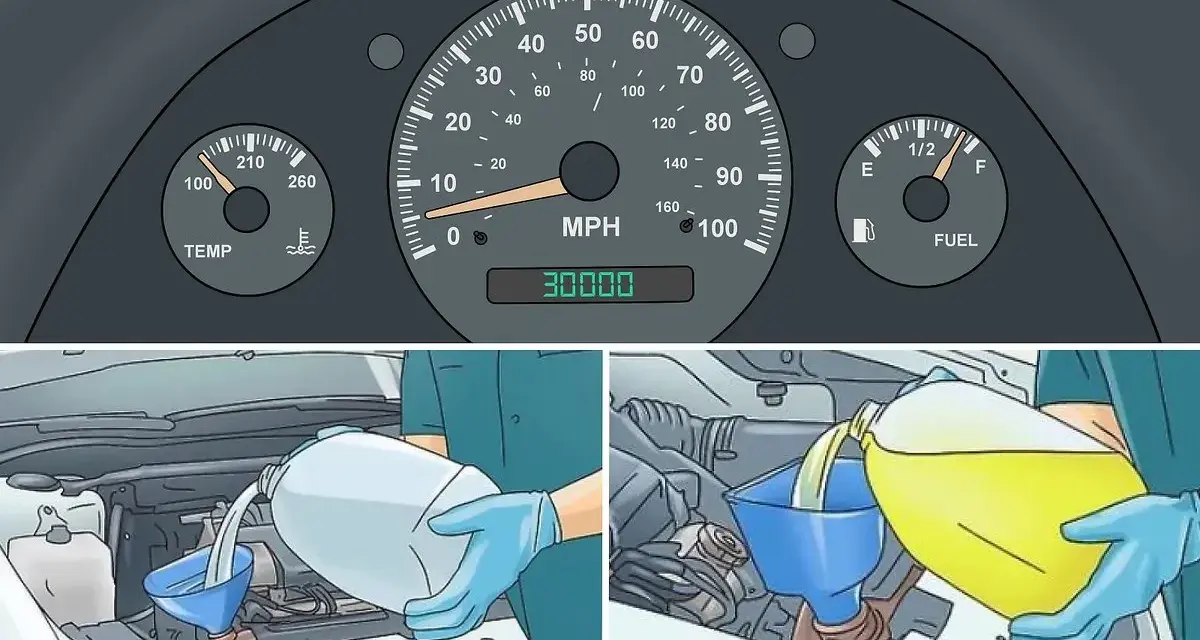
I treat a radiator flush as maintenance, not magic. It makes sense when the coolant is old, the fluid has turned brown or muddy, the heater output has dropped, or the temperature gauge is creeping up in traffic even though the level looks full. On some cars, especially those with a busy front cooling stack, a weak cooling system can also make the condenser and fans work harder, which is why air-conditioning performance can feel worse at low speed.
| What you notice | What it usually points to | What I would do next |
|---|---|---|
| Coolant looks rusty, brown, or gritty | Corrosion and sediment inside the system | Flush soon and inspect hoses, cap, and thermostat |
| Cabin heat is weak or uneven | Air pocket or partial blockage in the heater circuit | Flush, then bleed the system carefully |
| Temperature rises in traffic but settles at speed | Poor heat rejection or restricted flow | Check the radiator, fans, and coolant condition |
| Coolant is oily or milky | Oil contamination or a more serious engine fault | Stop treating it as routine maintenance and diagnose the cause |
There is no universal interval for every vehicle, so I would always check the handbook first. Many systems are serviced somewhere in the 2 to 5 year range depending on coolant type and manufacturer guidance, but the condition of the fluid matters more than the calendar alone. Once you know a flush is justified, the next job is getting the right tools and the right coolant on hand.
What to gather before you start
The preparation stage saves the most time. Most passenger cars take roughly 4 to 12 litres of coolant depending on engine size and whether the vehicle has extra coolant circuits, so I would buy enough fluid to cover a full refill and a little spare for bleeding. If you are buying concentrate, use the exact mix ratio stated by the manufacturer; many systems still call for a 50/50 mix, but pre-mixed coolant should be used as supplied.
- The correct coolant specification for your vehicle
- Distilled or deionised water for rinsing and mixing
- A drain pan large enough for the full system volume
- A funnel and a clean jug or measuring container
- Gloves and eye protection
- Axle stands if you need extra access under the car
- Basic hand tools for hose clips or the radiator drain plug
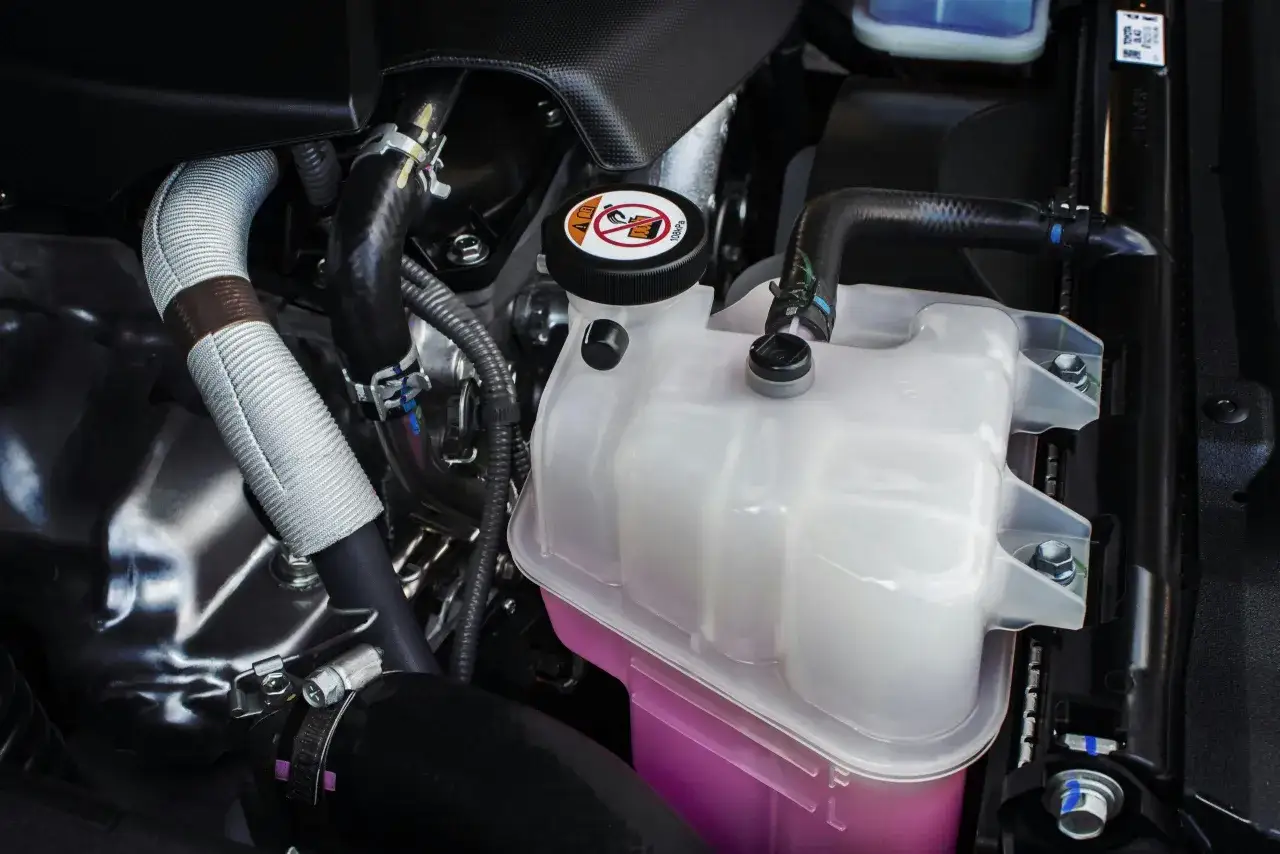
If your car has the cap on the expansion tank rather than directly on the radiator, use that fill point and ignore the old habit of opening the front cap. Modern cooling systems vary more than people expect, and that is one reason I always say the handbook is the starting point, not a suggestion. The actual draining and rinsing process comes next, and that is where most mistakes begin.
Drain, rinse and clear the system
This is the part most people picture when they think about a coolant flush, but the order matters. Work with a completely cold engine, catch every drop of old coolant, and do not rush the rinse just because the first drain looked fairly clean. If the fluid is contaminated, a quick drain and refill often leaves the worst material behind.
Drain the old coolant
Set the heater to its hottest position before you start. On many cars that opens the heater valve and lets coolant leave the heater core as well, which is important if you want a proper flush rather than just emptying the radiator. Open the cap only when the engine is cold, then drain from the radiator tap or the lower hose into your container. If the drain point is awkward or blocked, you may need to loosen the lower hose instead, but do that slowly and expect a sudden flow.
Used coolant is hazardous waste. In the UK, I would keep it sealed in a suitable container and take it to a household waste recycling centre or follow local council guidance. Do not tip it down a drain, onto soil, or into general waste.
Rinse until the water runs clear
Once the system is empty, refill it with distilled or deionised water, then run the engine only long enough for the thermostat to open if the handbook allows that procedure. Let it cool fully, drain again, and repeat until the water comes out clear. If the drained water is still brown after the second rinse, there is still sediment in the system, and I would not refill with fresh coolant until that improves. For a lightly contaminated system, this water flush is often enough. It clears loose debris without being as aggressive as chemical cleaners, which is useful on a car that simply missed its service interval. If the cooling system is badly sludged, though, you may need more than water.Use a chemical flush only when the system needs it
Chemical flush products can help with rust scale and stubborn residue, but they are not a shortcut for a broken system. I use them only when the contamination is moderate and the cooling circuit is otherwise sound. If there is oil in the coolant, a collapsed hose, a leaking head gasket, or a blocked radiator core, no cleaner will solve the root problem. Follow the product instructions exactly, then rinse thoroughly afterwards so the new coolant is not diluted by leftover cleaner.
After the system is drained and clean, the last major step is refilling it correctly and getting the air out. That part is often what separates a successful flush from a comeback job.
Refill and bleed the air out properly
Air trapped in a cooling system is a nuisance because it acts like a weak point in the circuit. The engine may seem fine for a few minutes, then the gauge climbs, the heater goes cold, or the electric fan runs harder than expected. For that reason, I do not treat refilling as a simple pour-and-go job.
Fill slowly with the right mix
Use the coolant specification the manufacturer calls for, not just any antifreeze on the shelf. If you are mixing concentrate, use distilled or deionised water and the correct ratio. Pour slowly through the highest fill point, pause as the level drops, and keep topping up until the system will take no more. If the car has a bleed screw, open it carefully and close it once only coolant, not air, is coming out.
Some newer cars have specific refill procedures, especially those with electric water pumps or vacuum-fill systems. If the handbook calls for one, follow it instead of improvising. That is one of those moments where a shortcut can create a bigger problem than the flush itself.
Read Also: How to Put Coolant in Your Car - Safe & Easy Guide
Bleed until the bubbles stop
Start the engine with the heater set to hot and watch the level closely as the thermostat opens. As coolant begins to circulate, the level often drops again, which is normal. Top it up in small amounts, let the engine stabilise, and keep going until the bubbles stop appearing. When you are satisfied, fit the cap, take a short drive, let the engine cool completely, and recheck the level the next day.
A small top-up after the first heat cycle is normal. A repeated drop in level is not. If that happens, I would look for a leak, a trapped air pocket, or a part that is no longer sealing properly. That leads straight into the mistakes that turn a routine flush into an annoying repeat repair.
The mistakes that create repeat overheating
Most bad flushes fail for simple reasons rather than dramatic ones. People use the wrong coolant, leave air in the system, or assume that a flush can make up for a mechanical fault. Here is where I see the trouble most often:
- Using tap water for the final refill, which can leave mineral deposits behind.
- Mixing coolant types that are not compatible with each other.
- Skipping the bleed procedure because the system “looked full enough”.
- Ignoring a sticky radiator cap, which can prevent the system from holding pressure.
- Flushing a car with oily coolant and expecting the flush to solve an engine fault.
- Forgetting to check the heater circuit, which can hide trapped air in the heater core.
My practical rule is simple: if the coolant was only old and dirty, a careful flush usually restores normal operation. If the coolant looks contaminated in a different way, such as milky, greasy, or full of heavy sludge, I stop thinking like a maintenance job and start thinking like a diagnosis. That is the point where a flush may still be part of the repair, but it is no longer the whole repair.
When a flush is not enough
There are a few faults a coolant flush will not fix, and trying to push through them only wastes time and coolant. A blocked heater core may need a separate back-flush. A thermostat that sticks open or closed needs replacement. A failing water pump may circulate coolant poorly even when the radiator is spotless. And if combustion gases are getting into the cooling system, the real issue is much larger than sediment.
| Sign | Likely issue | Next step |
|---|---|---|
| Coolant is oily or smells burnt | Cross-contamination or engine fault | Inspect for oil cooler, gasket, or head-gasket problems |
| Temperature spikes at motorway speed | Circulation or thermostat issue | Check thermostat, water pump, and hose condition |
| Heater stays cold after bleeding | Airlock or heater core restriction | Bleed again or back-flush the heater circuit |
| Fans run constantly after refill | Air in the system or sensor confusion | Recheck coolant level and bleed procedure |
| Coolant disappears again within days | External leak or internal loss | Pressure-test the system before driving much further |
I like this section because it keeps the job honest. A flush is excellent maintenance, but it is not a cure-all. If the same symptoms return quickly, the system is telling you that something else needs attention, and that is where the value is in stopping and testing rather than repeating the same flush twice.
What I check after the first drive
The first heat cycle tells you more than the initial refill. After a short drive, park the car, let it cool completely, and inspect the level again. Check the hose joints, drain plug, and cap area for dampness, and look for any sweet coolant smell under the bonnet. I also watch the temperature gauge on the second drive, because a system with trapped air often looks fine at idle and then misbehaves once load and airflow change.
If the level is stable and the heater blows properly, the flush has probably done its job. If not, I would not keep topping up and hoping for the best. I would recheck the bleed procedure, inspect for leaks, and confirm that the correct coolant is in the system. That final discipline is what keeps a simple maintenance job from turning into the next overheating fault.