
A flat or weak car air-conditioning system is usually a chain of small faults, not one dramatic failure. I start with airflow, belts, filters, and fan operation before I touch refrigerant, because that order separates a cheap maintenance job from a real repair. This guide shows the diagnosis path, the fixes that actually restore cold air, and the point where a garage is the smarter call. That is the practical answer to how to fix car AC without guessing at parts.
The quickest route to cold air starts with diagnosis, not a can of gas
- Weak cooling is often caused by low refrigerant, but low refrigerant usually means a leak that needs to be found.
- Check the cabin filter, condenser airflow, belt condition, and cooling fans before you pay for a recharge.
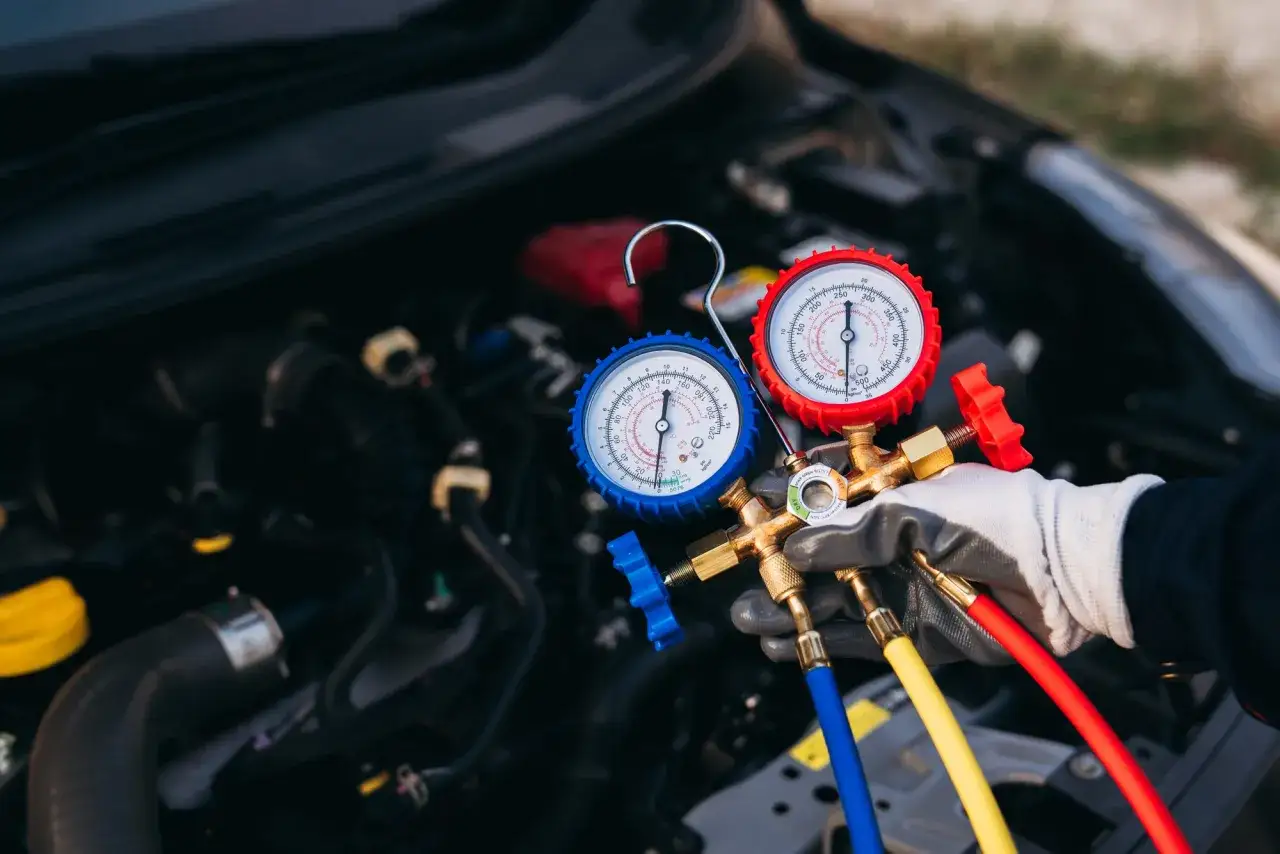
- RAC says a proper regas normally takes no longer than an hour and many manufacturers recommend it about every two years.
- UK regas prices vary widely; RAC puts them roughly at £50 to £200 depending on the vehicle and workshop.
- Compressor, condenser, pressure sensor, or blend-door faults need different repairs, so symptom matching matters.
- If you see oily residue, hear grinding, or lose cooling again quickly, stop DIY and diagnose the leak.
Read the symptom before you add refrigerant
I read air-con faults by the symptom first. A system that blows warm air in traffic but cools at speed points to airflow across the condenser, while one that loses cooling only after a few minutes often points to low refrigerant, a pressure fault, or a compressor that is dropping out under load. On dual-zone cars, one side being colder than the other usually shifts the suspicion away from the refrigerant charge and toward a blend-door issue.
| Symptom | What it often points to | First check |
|---|---|---|
| Warm in traffic, cooler on the motorway | Condenser fan problem or blocked condenser | Fan operation, leaves, bent fins, airflow through the grille |
| Cold for a short time, then warm | Low charge, leak, or pressure switch issue | Oily residue, service history, proper pressure test |
| Clicking, grinding, or a heavy drag when AC is switched on | Compressor, clutch, or bearing trouble | Stop running it and inspect the belt drive and compressor area |
| Weak airflow but the air is cold | Cabin filter, blower motor, or resistor problem | Filter condition and fan speed on every setting |
| One side cold, one side warm | Blend-door actuator or calibration fault | Temperature settings and actuator operation |
| Musty or damp smell from the vents | Cabin filter, evaporator moisture, or blocked drain | Filter, evaporator treatment, drain outlet |
If the air never changes at all when AC is switched on, the electrical side deserves attention before refrigerant. Once the symptom points you in the right direction, I move to the low-cost checks that can rule out half the field in ten minutes.
Check the cheap, visible faults first
The checks below cost little or nothing and they catch more faults than people expect. They are also the checks I would want done before any workshop starts selling me a recharge.
- Verify the settings first. Make sure the air-con is switched on, the temperature is set low, recirculation is enabled, and the fan speed is high enough to feel a clear airflow.
- Inspect the cabin filter. If it is packed with dust or leaves, it can make the system feel weak even when the refrigerant charge is fine.
- Check the belt, fuse, and relay. A cracked drive belt, blown fuse, or failed relay can stop the compressor from being commanded properly.
- Look through the front grille and condenser. Bent fins, mud, plastic bags, and insect debris reduce heat transfer fast.
- Confirm that the radiator and condenser fans run when AC is selected. On many cars, a dead fan makes the system look like a refrigerant fault because the condenser cannot dump heat.
- Watch for water under the car and smell for dampness. A blocked evaporator drain or a dirty evaporator can create odour and poor cabin comfort even when cooling still works.
One detail I would not ignore is airflow through the dashboard itself. If the blower only works on one speed, the fault may sit in the blower motor resistor rather than the air-con circuit. If those basics do not change the behaviour, the next question is whether the refrigerant charge is actually low or just being blamed for a different problem.
A regas helps only when the system is still sealed
Refrigerant does not get used up in normal operation. When the gas is low, there is usually a leak, and simply adding more refrigerant masks the fault until the system goes weak again. RAC says a proper regas normally takes no longer than an hour and that many manufacturers recommend servicing the air-con roughly every two years. It also puts UK regas pricing at about £50 to £200 depending on the system and workshop.
| Job | When it makes sense | What it should include |
|---|---|---|
| Basic regas | The system is slightly weak and there are no signs of compressor damage | Recover old refrigerant, vacuum the circuit, refill to the exact mass, check oil level |
| Leak diagnosis | The AC loses charge quickly or shows oily residue around fittings | Pressure testing, UV dye or nitrogen testing, then repair before refill |
| Full air-con service | The system is overdue, smells stale, or has not been checked for years | Leak check, vacuum test, recharge, lubricant check, cabin filter and hygiene treatment |
Many newer cars use R1234yf rather than older R134a, and that matters because the service equipment and cost are not the same. I never use a stop-leak canister on a road car. Those products can contaminate recovery gear and turn a simple leak into a much messier workshop problem. If the system needs topping up more than once, it needs a leak test, not another can.
That is where the real repairs begin, because the part that failed can be very different from the part that made the cabin warm.
The parts that fail most often
Halfords lists leaks, compressor or condenser failure, drive belt failure, and lack of use among the common reasons air-con stops cooling, and that matches what I see most often in practice. The trick is not to replace parts in the dark; it is to match the symptom to the likely failure and confirm it with pressure and electrical testing.
| Component | Typical clue | Usual repair |
|---|---|---|
| Compressor | Noisy, not engaging, or showing poor pressure difference | Replace the compressor, often with the receiver-drier or accumulator, then flush and recharge |
| Condenser | Cooling is weak in traffic or the front of the car shows impact damage | Replace the condenser and confirm the cooling fan and airflow path |
| Expansion valve or orifice tube | Icing, unstable cooling, or odd pressure readings | Replace the metering device and evacuate/recharge the system |
| Pressure sensor or switch | The compressor is cut in and out or never gets commanded on | Test wiring and sensor output, then replace the faulty part if needed |
| Blend-door actuator | One side of the cabin is hot while the other is cold | Recalibrate or replace the actuator behind the dashboard |
| Receiver-drier or accumulator | The system has been opened for major repair and moisture control is now important | Replace it during the repair so moisture does not keep circulating |
The receiver-drier or accumulator is the moisture trap of the system, so once the circuit has been opened for major work, I treat it as a replace-with-the-job item rather than an optional extra. If a compressor has failed internally, metal debris can spread through the circuit, and that changes the repair from a simple part swap into a full system cleanup.
What you can safely do yourself
I keep DIY to jobs that improve airflow, hygiene, and basic electrical supply. Anything involving refrigerant recovery, pressure readings, or sealed parts moves beyond home repair and into specialist territory.
- Replace the cabin filter if it is dirty, damp, or blocked with leaves and dust.
- Clear debris from the front of the condenser and radiator with care, using low pressure and a soft brush if needed.
- Inspect visible belts, fuses, and connectors for damage or looseness.
- Check that both cooling fans run when the air-con is switched on.
- Run the air-con regularly, including in winter, so seals stay lubricated and the system does not sit idle for months.
- Use an evaporator-safe cleaner if the vents smell stale, and make sure the drain is not blocked.
- Confirm the refrigerant type on the under-bonnet sticker before any workshop service so the wrong gas is never used.
If the blower is noisy or only works on one speed, the resistor or motor may be the real issue, not the refrigerant circuit. I would also avoid DIY recharge kits unless I already knew the exact gas type and had ruled out a leak. Even then, the value is questionable when a proper diagnostic can tell you what the system actually needs.
When the fault is still there after those basics, the system is asking for test equipment, not another bottle of refrigerant.
When to stop DIY and book a specialist
The sealed part of the system is pressurised, and refrigerant can cause frost injury if it escapes unexpectedly. More importantly, a quick top-up without leak finding is how people end up paying twice. I stop and hand it over when I see any of these signs:
- The air-con goes cold again within days or weeks.
- There is oily residue around pipes, joints, the condenser, or the compressor.
- The compressor area makes grinding, squealing, or heavy knocking noises.
- The condenser fan does not run, or cooling only works when the car is moving fast.
- Fuses keep blowing or the compressor command is intermittent.
- The vehicle is a hybrid or EV with electric compressor and high-voltage AC components.
A good diagnostic should recover the refrigerant properly, pressure-test the circuit, inspect both sides of the system, and confirm whether the evaporator, condenser, compressor, or control side is actually at fault. If a garage cannot explain the problem in those terms, I would keep looking. A proper diagnosis is not just a scan tool reading; it is a test of how the whole system is behaving under load.
Once the system has been diagnosed, the repair order matters almost as much as the repair itself.
The repair order that prevents repeat bills
If I were fixing a weak air-con system today, I would use this sequence:
- Confirm airflow, settings, and fan operation first.
- Inspect the cabin filter, condenser face, belt, and visible wiring.
- Test for refrigerant loss before any recharge is approved.
- Repair the leaking or failed component rather than hiding the symptom with gas.
- Replace the receiver-drier or accumulator when the system has been opened for major work.
- Vacuum evacuate the circuit and refill it with the exact refrigerant mass specified for the car.
- Verify vent temperature, pressure readings, and demist performance after the repair.
That sequence is slower than buying the first recharge kit on the shelf, but it is usually cheaper in the end because it removes the cause rather than the symptom. In the UK, the smartest spend is often a proper diagnosis first, then a regas only if the circuit is proven tight enough to hold it. Keep the system used through the year, replace the cabin filter on schedule, and you will avoid most of the common air-con failures before they start.