Key things to know before you replace anything
- This is usually a heater circuit problem, not automatically a bad catalytic converter.
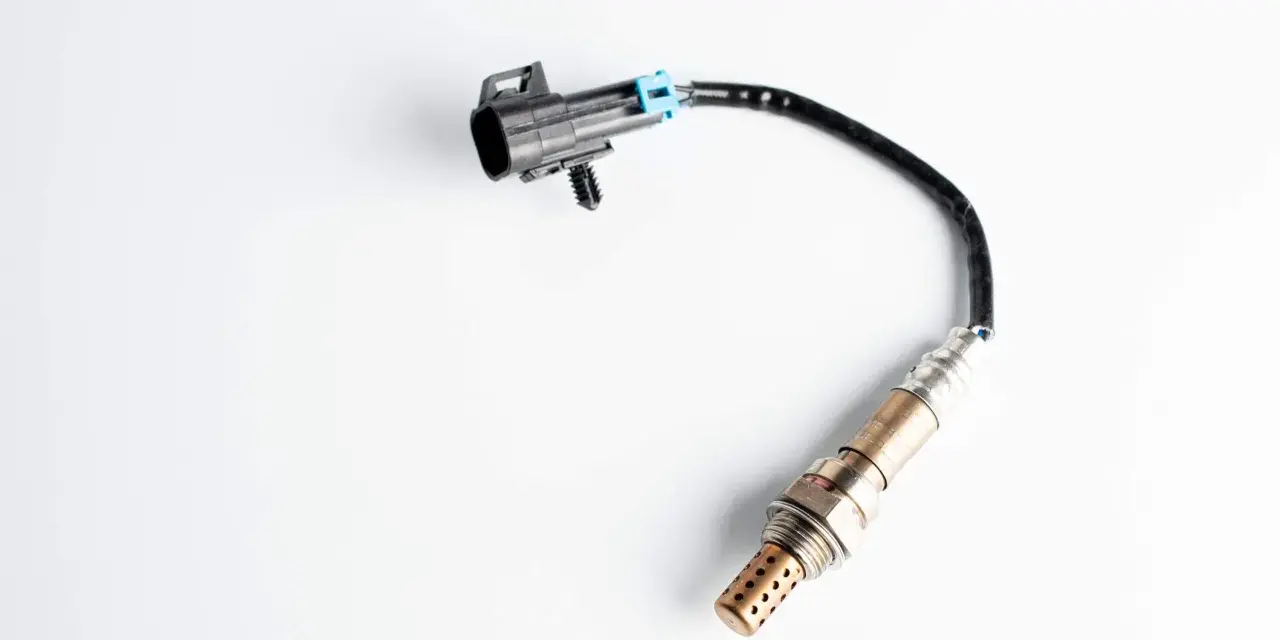
- Bank 1 sensor 2 is the downstream lambda sensor, located after the catalytic converter.
- The car may still drive normally, but cold-start emissions and MOT risk can increase.
- Common causes include a failed sensor heater, blown fuse, damaged wiring, corrosion, or a relay fault.
- A quick visual check and a few electrical tests are usually more useful than guessing.
- In the UK, a straightforward fix is often cheaper than many people expect, but dealer pricing and seized exhaust hardware can push the bill up.
What the fault actually means
When I diagnose this issue, I start with the basics: bank 1 means the side of the engine that contains cylinder 1, and sensor 2 means the sensor after the catalytic converter. On a four-cylinder engine there is only one bank, so the code still points to the single downstream sensor. On a V6 or V8, it points to the sensor on the cylinder 1 side.The heater inside the lambda sensor exists for one simple reason: exhaust heat alone is too slow at start-up. The heater brings the sensor up to operating temperature much faster, so the engine computer can trust its readings sooner. If that heater circuit fails, the car often sets the fault before you notice any big drivability issue.
That is why this fault is often more about emissions control and cold-start strategy than immediate running problems. The engine may feel normal once warm, but the underlying circuit still needs proper testing. That distinction matters, because the next step is not “replace the first part you see” but “work out which part of the circuit has actually failed.”
| Code | What it usually points to | Common mistake |
|---|---|---|
| P0141 | Heater circuit fault on bank 1 sensor 2 | Replacing the catalytic converter first |
| P0135 | Heater circuit fault on bank 1 sensor 1 | Buying the wrong oxygen sensor |
| P0420 | Catalyst efficiency below threshold | Assuming every emissions code means the sensor heater is bad |
Once you know what the code is actually targeting, the symptom pattern becomes easier to read, and that saves a lot of unnecessary parts swapping.
The symptoms that matter and the ones that do not
The most common sign is still the obvious one: the engine management light stays on. Beyond that, many drivers notice very little at first, which is exactly why this fault gets ignored. I would not rely on “the car feels fine” as proof that the circuit is healthy.What I usually see with this fault is a mix of subtle and practical symptoms rather than dramatic ones:
- Check engine light or MIL illuminated
- Failed or incomplete emissions readiness
- Slightly higher fuel use on short trips
- Longer warm-up before the car settles into clean closed-loop control
- Occasional roughness only when cold, if another fault is present
The symptom I treat with caution is rough running. A heater circuit fault by itself does not usually make the engine misfire badly or run dramatically poorly. If the engine is stumbling, losing power, or smelling strongly of fuel, I assume there may be another issue alongside the P0141 fault, not just a bad downstream sensor.
That is a useful filter, because it stops you from chasing the wrong problem, and it leads directly into the causes that are worth checking first.
Why the heater circuit fails in the first place
In practice, I group the causes into four buckets: the sensor itself, the wiring, the power supply, and the control side of the circuit. That is the cleanest way to avoid guesswork.
- Failed heater element inside the lambda sensor - this is common, especially on older sensors exposed to heat cycles and road grime.
- Damaged wiring or connector - exhaust heat, road spray, and chafing can break the circuit or create resistance where the computer expects a clean signal path.
- Blown fuse or relay fault - if the sensor is not getting proper battery feed, the heater cannot work even if the sensor itself is fine.
- ECU driver or ground issue - less common, but still real when the sensor and harness test correctly.
There are a few secondary factors that can confuse the picture. A connector packed with corrosion can behave like a dead sensor. A harness that has been pulled tight during previous exhaust work can fail intermittently. On some cars, a shorted heater circuit can blow a fuse and make the fault look bigger than it is.
I also tell people not to confuse this with an exhaust leak or a catalyst efficiency fault. Those can happen at the same time, but they are not the same failure. A heater circuit code is electrical first, and that is how I diagnose it.
How I would diagnose it step by step
When I want a reliable answer, I start with freeze-frame data and a visual inspection, then move into electrical testing. That order matters, because it tells me whether the fault happened on a cold start, after a long drive, or during a specific operating condition.
-
Confirm the code and check for related faults
Look for other emissions or heater codes. If there are additional codes for the same side of the engine, the wiring or shared supply circuit becomes more suspicious.
-
Inspect the sensor, connector, and harness
I look for melted insulation, oil saturation, broken clips, green corrosion in the plug, or a harness sitting too close to the exhaust. This is quick, and it catches a lot of real-world failures.
-
Check the fuse and relay feed
Many systems feed the heater from battery voltage through a fuse or relay, then let the engine computer control the ground or switching side. If the feed is missing, the sensor cannot heat up no matter how new it is.
-
Test heater resistance with a multimeter
A healthy sensor heater should show a sensible resistance value according to the manufacturer’s specification. An open circuit, a dead short, or a reading that is far outside spec is a strong sign the sensor has failed.
-
Verify power and ground at the connector
If the sensor itself tests well, I check whether the harness is delivering the right voltage and whether the control side is doing its job. This is where a wiring fault usually reveals itself.
-
Only suspect the ECU after everything else checks out
That step matters because control module failure is possible, but it is not where I start. Replacing an ECU too early is an expensive way to guess.
As a rule, I trust live data, resistance checks, and connector inspection more than parts catalog logic. A basic code reader will tell you what failed; the testing tells you why. Once that is clear, the repair choice becomes much easier.
What a proper repair looks like
If the heater inside the sensor is open, the right repair is usually a new sensor fitted to the correct bank and position. If the harness is damaged, I repair the circuit rather than hiding the problem with a new part. If a fuse or relay is blown, I make sure there is not a downstream short before replacing it again.
That sounds obvious, but it is where a lot of people lose money. I see three repeat mistakes all the time: fitting the upstream sensor instead of the downstream one, buying a universal part that needs awkward wiring changes, and replacing the catalytic converter when the fault is actually electrical.
For most cars, I prefer an OE-spec or reputable aftermarket lambda sensor from a known manufacturer. Cheap sensors can work, but heater resistance, connector quality, and response characteristics matter more than the box they come in. If the original fault was caused by heat-damaged wiring, I would also inspect the loom after fitting the new sensor so the replacement does not suffer the same fate.
If the exhaust fasteners are seized or the sensor has welded itself into the pipe, labour time can climb quickly. That is normal on older UK cars, especially where winter road salt has been doing its work for years. The repair itself is often simple; the access is what decides the bill.
That practical split between sensor, wiring, and access also explains why the UK price range is wider than many owners expect.
What it is likely to cost in the UK
For UK drivers, the cheapest outcome is usually a wiring or connector repair, while the most common outcome is a straightforward lambda sensor replacement. Diagnostic time is normally the first bill you pay, and it is worth paying if it prevents a wrong part from going on the car.| Job | Typical UK ballpark | What changes the price |
|---|---|---|
| Basic diagnostic scan and testing | £40-£120 at an independent garage, £90-£180 at a dealer | Labour rate, live-data testing, and how much tracing is needed |
| Lambda sensor replacement | £110-£220 on many common cars | Parts brand, access, seized threads, and exhaust layout |
| Wiring or connector repair | £60-£200 | How far the damage runs and whether the loom is heat-shielded |
| Premium or dealer-level repair | £250-£400+ | OE parts pricing, brand-specific labour, and difficult access |
For a typical family car, that lines up with what I would expect from a solid independent garage. The total can be lower if the issue is a simple fuse or connector, and it can go much higher if the sensor is seized, the wiring is brittle, or the car needs genuine parts. I would treat any quote that skips diagnosis as a red flag, because this is exactly the kind of fault that gets mis-sold as a one-part fix.
There is also an MOT angle in the UK. The GOV.UK MOT manual checks the malfunction indicator lamp, so I would not leave an emissions-related warning light hanging around until test day. Even if the car seems to drive well, an illuminated light can turn into a test-day headache, and a proper repair is usually cheaper than a failed MOT followed by rushed work.
Once the cost picture is clear, the smartest move is to stop thinking in terms of “clear the light” and start thinking in terms of “prove the circuit.”
The smartest next move before you replace the lambda sensor
If I had one rule for this fault, it would be simple: test the circuit before you buy the part. Check the freeze-frame data, inspect the connector, verify the fuse and relay, and measure the heater circuit before you order anything. That sequence catches the boring but expensive mistakes.
On a road car, I would replace the sensor only when the heater tests fail or when the wiring checks out and the sensor is the clear weak point. If the code returns after a reset, I would not keep clearing it and hoping for the best. I would go back to the electrical side of the system, because repeat faults almost always mean something was missed.
For a UK owner, that approach keeps the job grounded: diagnose first, repair the actual failure, and only then clear the code and road test the car long enough for the monitor to run again. That is the cleanest way to deal with the fault without paying twice.