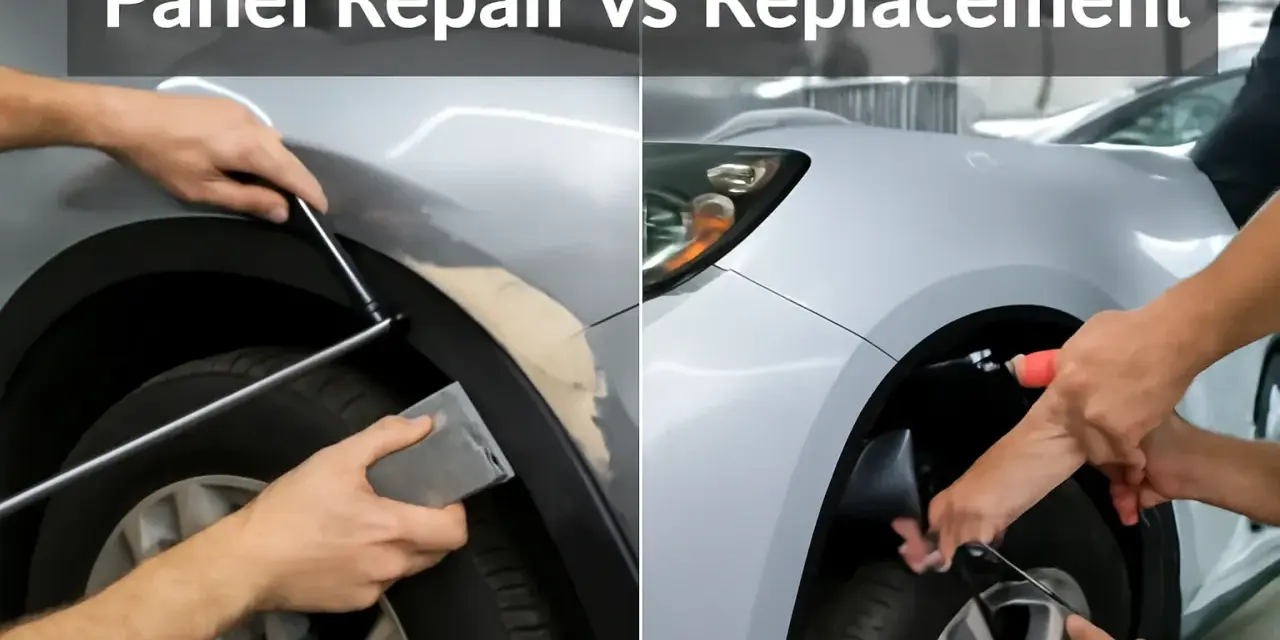
Exterior panel damage is more than a cosmetic nuisance: it changes how the car looks, how easy it is to keep clean, and how likely the finish is to rust or deteriorate later. In this guide, I break down how I assess dents, scratches, chips, and scuffs, when a DIY fix makes sense, when a bodyshop is the better call, and which detailing steps actually protect the paint rather than just disguising the problem.
The fastest way to handle panel damage is to match the repair to the depth of the mark
- Light clear-coat scratches can often be improved with polishing, while deeper marks usually need touch-up paint or a repaint.
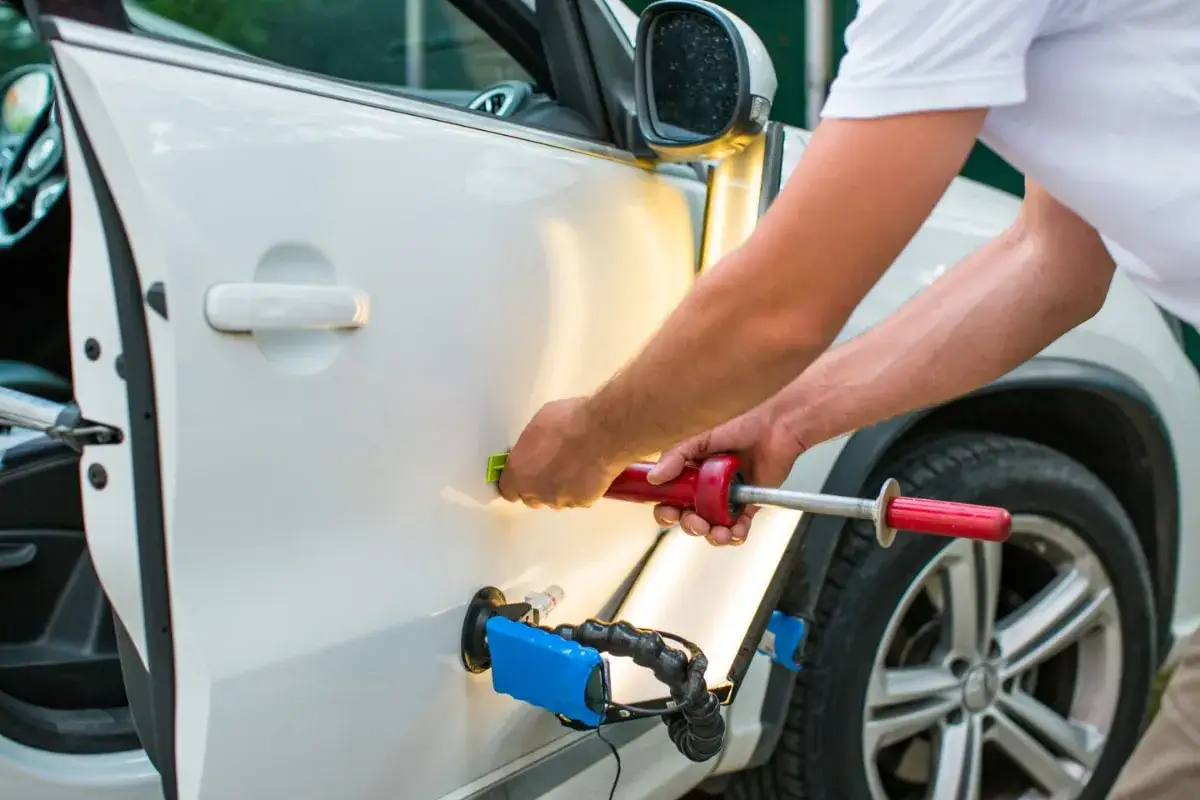
- Shallow dents with no paint break are good candidates for paintless dent repair, but creases and edge damage are far less DIY-friendly.
- Any chip that reaches primer or bare metal should be sealed promptly, especially on UK roads where salt and moisture accelerate corrosion.
- SMART repair is best for small, localised damage; full-panel refinishing is usually reserved for larger, deeper, or badly matched repairs.
- Ceramic coatings help with cleaning and chemical resistance, but PPF is the better choice if stone chips are the main issue.
What exterior panel damage actually includes
When I look at bodywork damage, I separate it into a few simple groups: surface marks, paint loss, dents, cracking, and structural misalignment. That matters because each one points to a different repair path, and not all of them need the same level of intervention.
| Damage type | What it usually means | Best next step |
|---|---|---|
| Clear-coat scuff or swirl | The top layer is marred, but the colour coat is intact | Wash, inspect, then polish or machine correct if needed |
| Scratch through the colour | The defect has reached the base coat or primer | Touch-up paint or SMART repair, depending on size |
| Chip to bare metal | Protection is gone and rust can start | Clean, seal, prime, and touch in as soon as practical |
| Shallow dent | The panel is pushed in but the paint is still sound | Paintless dent repair is often the cleanest option |
| Crease or body-line hit | The panel has been sharply folded or stretched | Bodyshop repair, and sometimes replacement |
| Cracked bumper or trim | Plastic has split, not just scuffed | Plastic repair, refinish, or replacement |
On UK cars, I pay special attention to wheel arches, bonnet edges, door corners, and lower bumpers because those areas pick up road grit, parking scrapes, and winter salt first. Once you know what you are actually dealing with, the repair decision becomes much easier.
How I judge whether a repair is cosmetic or more serious
I start with the paint layers, because they tell me almost everything. If the damage is only in the clear coat, I think in terms of correction. If colour is missing, I think in terms of touch-up or refinishing. If primer or bare metal is visible, I stop treating it like a detailing issue and start treating it like a repair issue.
A useful rule of thumb is that a shallow dent under roughly 3 inches across, with no paint break and no sharp crease, may be a good candidate for DIY or paintless dent repair. That lines up with the kind of guidance I see from UK motoring advice, including RAC's advice on when home repair is realistic. Once the damage sits on a curve, a body line, or the edge of a panel, the odds of a neat DIY result drop fast.
- Clear coat only - usually feels smooth and may improve with polishing.
- Base coat or primer exposed - needs touch-up or paint work, not just polish.
- Bare metal visible - treat it as urgent because corrosion can start quickly.
- Dent on a crease or edge - usually needs professional tools and experience.
- Misaligned gaps, broken clips, warning lights, or damaged sensors - inspect professionally before doing anything cosmetic.
I also check the surrounding area in strong light. A mark that looks small in the shade can hide a stretched panel, cracked lacquer, or a chip pattern that tells me the impact was harder than it first appeared. That leads neatly into the question most readers really have: what should the repair cost, and which option is worth paying for?
Repair options and typical UK costs
For planning purposes, I treat UK repair pricing as a range rather than a promise. Vehicle size, paint type, panel location, aluminium versus steel, and the need to blend into adjacent panels can move the quote a lot. These figures are useful for judging whether a repair is cheap, fair, or clearly not worth doing by hand.
| Repair option | Best for | Typical UK cost | Time | Watch-outs |
|---|---|---|---|---|
| Polish, compound, or touch-up kit | Light scratches, tiny chips, faint scuffs | About £15-£60 for materials | 30 minutes to a few hours | Won't fix dents or deep paint loss |
| Paintless dent repair | Shallow dents with intact paint | About £75-£200 per panel | Same day in many cases | Poor fit for creases, sharp edges, or cracked paint |
| SMART repair | Small localised scuffs, scrapes, bumper marks | About £150-£400 | Half a day to a day | Best on small areas; not ideal for large visible panels |
| Bodyshop repair and blend | Deeper scratches, dents, panel refinishing | About £300-£900 | 1-3 days | Colour matching and blending quality matter a lot |
| Panel replacement or full respray | Severe damage, cracked panels, badly mismatched finishes | About £1,000-£5,000 | Several days or longer | Often the right choice for major damage, but rarely the cheapest |
The term SMART repair stands for Small to Medium Area Repair Technique, which is exactly what it sounds like: a localised fix that targets only the damaged section rather than repainting more than necessary. For bumper scuffs and isolated scratches, it can be excellent value. For deep creases, colour loss across a wide area, or damage near a sharp character line, I usually prefer a proper bodyshop repair because the finish lasts longer and blends more naturally.
Cost alone should not decide the job. A cheap repair that leaves mismatched colour or visible texture can be more expensive in the long run if you are trying to sell, return a lease, or keep the car looking genuinely clean. That is where detailing enters the picture, because the next layer of decisions is about what polish, wax, ceramic coating, or film can actually do.
What detailing can fix and what it cannot
I see a lot of confusion here, so I keep the rule simple: detailing improves or protects the surface, but it does not rebuild damaged material. If the mark lives only in the clear coat, detailing can help a lot. If the panel is dented, cracked, or exposed to metal, detailing is support work, not the cure.
- Polishing levels very light defects by removing a tiny amount of clear coat.
- Compounding is more aggressive and is better for duller scratches or heavier oxidation.
- Wax and sealants add a sacrificial layer that helps water bead and dirt release more easily.
- Ceramic coatings make washing easier and offer good chemical resistance, but they do not stop stone chips.
- Paint protection film is the best everyday protection against road debris, bumper rash, and chip-prone areas.
If a scratch catches a fingernail, I assume it is deeper than a simple polish can solve. If the scratch has gone through the colour coat and exposed primer, polish may improve the look, but it will not restore the lost finish. And if bare metal is showing, I would rather seal and repair it properly than chase shine over a problem that is already starting to corrode.
This is also where I am quite blunt about ceramic coatings: they are useful, but they are not armour. They are excellent for maintenance, especially on cars that see lots of washing, motorway grime, and bird droppings, but they are not the answer when the real problem is impact damage. For that, PPF is the stronger option, particularly on bonnets, mirrors, front bumpers, and the leading edges that take the hardest hits. Once you know what each product can realistically do, the repair process becomes much less guesswork.
The repair sequence I recommend
Whenever I am deciding how to handle panel damage, I work in the same order. It keeps me from making the finish worse and helps me separate a true repair job from a simple clean-up.
- Wash and dry the area properly so I can see the real defect, not road film or tar.
- Inspect in bright angled light, because side lighting reveals depth much better than flat daylight.
- Photograph the damage from a few angles, especially if I may need a quote or insurance view later.
- Check whether the mark is only surface deep, or whether it has reached paint, primer, or metal.
- Remove contamination such as tar or iron fallout before I touch any polish or touch-up paint.
- Choose the narrowest repair that still gives a durable result: polish, PDR, SMART repair, or bodyshop work.
- Protect the finished area with wax, sealant, coating, or film, depending on how exposed the panel is.
What I avoid is just as important. I do not start by rubbing a scratch harder than necessary, and I do not spray touch-up over dirty paint. I also avoid using household cleaners on the area, because they can strip protection and leave the finish duller than it was before. Good exterior care is usually about restraint, not heroics.
Once the repair is clear, the next question is whether the job should stay out of insurance, whether a lease will care, and how much the visible damage will affect resale.
When insurance, leasing, or resale changes the decision
For minor cosmetic damage, I often compare the repair cost with the policy excess and the likely effect on next year's premium. If the repair is close to the excess, paying privately is often simpler. If there is hidden damage, a bad alignment, a cracked sensor mount, or a more serious impact across multiple panels, I would rather involve the insurer early than discover problems later.
- Use insurance when the damage is extensive, structural, sensor-related, or clearly above your excess.
- Pay privately when the mark is small, localised, and unlikely to affect safety or panel fit.
- Treat a lease carefully because professional, warranty-backed repairs are usually much easier to defend at handback.
- Think about resale because poorly matched paint and visible filler often put buyers off more than a tidy, documented repair.
- Do not treat salvage or write-off history lightly if the car has suffered serious impact damage, because that is no longer a detailing problem.
On leased cars, I care less about whether a chip existed and more about whether the final finish meets professional standards and looks consistent with fair wear and tear. On a car I plan to sell, I want the repair to disappear visually rather than merely stop the damage spreading. A cheap patch that screams "repaired" can cost more in perceived value than a slightly pricier, cleaner job. That same logic applies to prevention: the better you protect the finish now, the less often you have to make these decisions later.
How I stop the same damage coming back
The best exterior care routine is not complicated, but it has to be consistent. I would rather see a car washed gently every couple of weeks than blasted through a harsh machine wash once in a while and left with fresh swirl marks after each visit.
- Use a proper hand wash method with a microfibre mitt and separate rinse water so grit is not dragged back across the paint.
- Dry with clean microfibre towels rather than an old sponge or abrasive cloth.
- Apply wax or sealant regularly if the car lives outside and sees year-round weather.
- Choose PPF for high-impact zones if motorway driving, gravel roads, or frequent stone chips are part of the car's life.
- Repair chips before winter, because salt and wet roads make exposed metal a much bigger problem.
- Park with care around supermarket bays, tight walls, hedges, and high-traffic kerbs where repeat scuffs are common.
My practical view is that wax and sealants are excellent maintenance tools, ceramic coatings are mainly about ease of cleaning, and PPF is the real answer when you want physical chip resistance. If you use the right product for the right job, the finish stays brighter, repairs stay less frequent, and the car looks better for longer.
The rule I use before I spend money on bodywork is straightforward: if the defect is only in the clear coat, I try correction first; if the colour is gone but the panel is straight, I move to touch-up or SMART repair; if the metal is showing, the panel is creased, or sensors and fittings are involved, I go straight to a proper bodyshop. That approach saves money when the issue is minor and prevents false economy when the damage is deeper than it first appears.