Clear coat, or lacquer in UK workshop language, is the layer that gives paint its depth and protects the colour underneath. When it goes dull, swirled, oxidised, or starts to peel, the right fix depends on whether the surface is merely tired or the coating has actually failed. In this guide I cover how to diagnose the damage, restore gloss safely, choose the right tools, and know when a respray is the only sensible answer.
The repair path depends on how far the clear coat has failed
- Light oxidation, swirls, and haze can often be improved with a proper wash, decontamination, and machine polishing.
- If a fingernail catches on the scratch, treat it as deeper than a simple surface mark until proven otherwise.
- Wet sanding is not a first move; it is a controlled leveling step for specific defects.
- Peeling, cracking, or exposed colour coat usually means repainting, not polishing.
- A dual-action polisher is the safer choice for most owners and gives enough correction for many jobs.
- In the UK, DIY materials are affordable, but bad sanding or burning through the lacquer quickly becomes expensive.
What clear coat damage you can still save
The clear coat is a sacrificial layer. It takes the UV, the road film, the bird mess, and the minor abrasion so the colour coat does not have to. That also means not every dull panel is a disaster. In many cases, the finish looks worse than it is because the surface has oxidised, picked up bonded contamination, or filled with fine wash marks.
The important distinction is between surface damage and coating failure. Surface damage can often be corrected. Failure means the lacquer has started to separate, crack, or disappear altogether. Once you know the difference, you stop wasting money on the wrong fix.
| What you see | What is usually happening | Best first response | DIY friendly |
|---|---|---|---|
| Dull, chalky, or grey-looking paint | Oxidation and surface contamination | Wash, decontaminate, then polish | Yes |
| Spider-web swirls under sunlight | Fine marring in the clear coat | Machine polish with a finishing or light cutting pad | Usually |
| Light scratches that do not go deep | Defects within the clear coat | Test spot with compound, then refine | Sometimes |
| Rough texture, runs, isolated nibs | Surface irregularity that may need leveling | Careful wet sanding, then polish | Only with patience |
| Peeling edges, cracks, white flaking, base coat showing | Clear coat failure | Panel repair or respray | No |
If you can still feel a smooth, hard surface and the finish is just lifeless, you are usually in restoration territory. If the lacquer is lifting, cracking, or coming off in sheets, polishing only thins what is left. Once you recognise that line, the process becomes a lot more straightforward, which is exactly where I want to take you next.
The safest DIY process for bringing gloss back
The safest way to restore gloss is to start with the least aggressive method that can still solve the problem. I would not reach for wet sanding first. I would not start with a rotary buffer either. For most cars, the sequence is simple: clean properly, inspect honestly, correct lightly, then protect the result.
-
Wash the car properly. Use a pH-neutral shampoo, the two-bucket method, and a clean wash mitt. Get rid of grit before you touch the paint with any machine or abrasive product.
-
Remove bonded contamination. If the surface feels rough after washing, use an iron remover and, if needed, a clay bar with plenty of lubricant. This step matters because contamination can hide the true state of the lacquer and make polishing less effective.
-
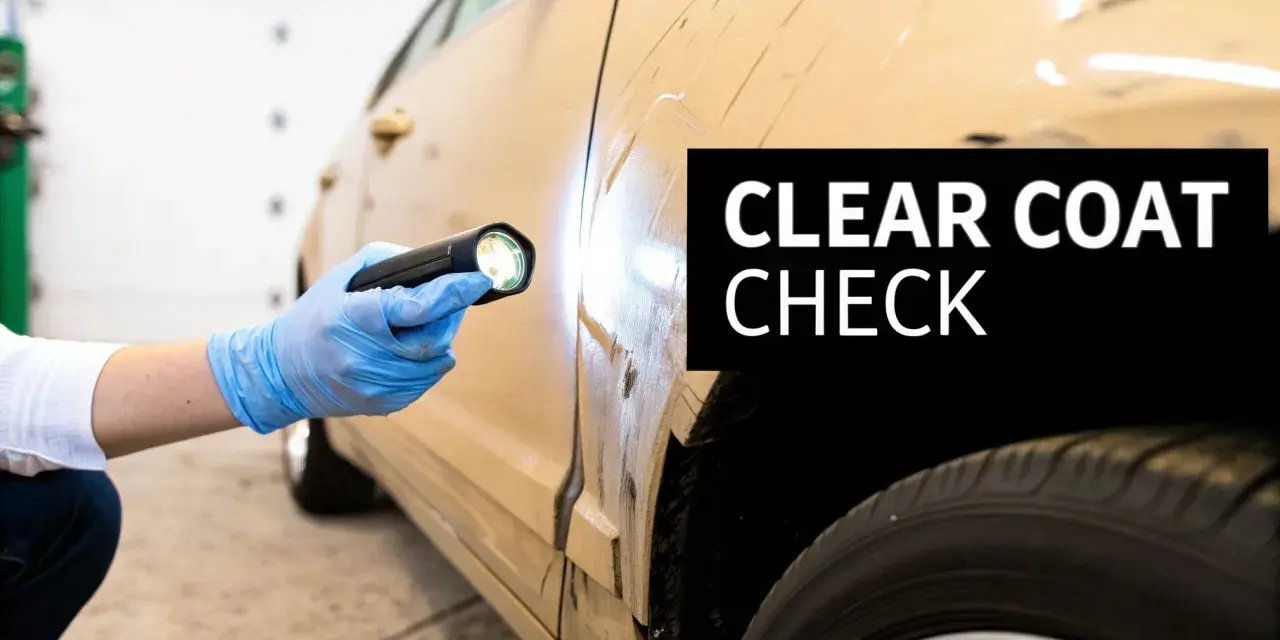
Inspect under strong light. Use daylight plus an inspection lamp or LED torch. Tape off edges, badges, and sharp body lines. These areas burn through first because the clear coat is usually thinnest there.
-
Do a test spot. Start with a finishing polish on a dual-action polisher and a soft foam pad. If that is not enough, step up to a light compound. I always prefer a small test area before I commit to the whole panel.
-
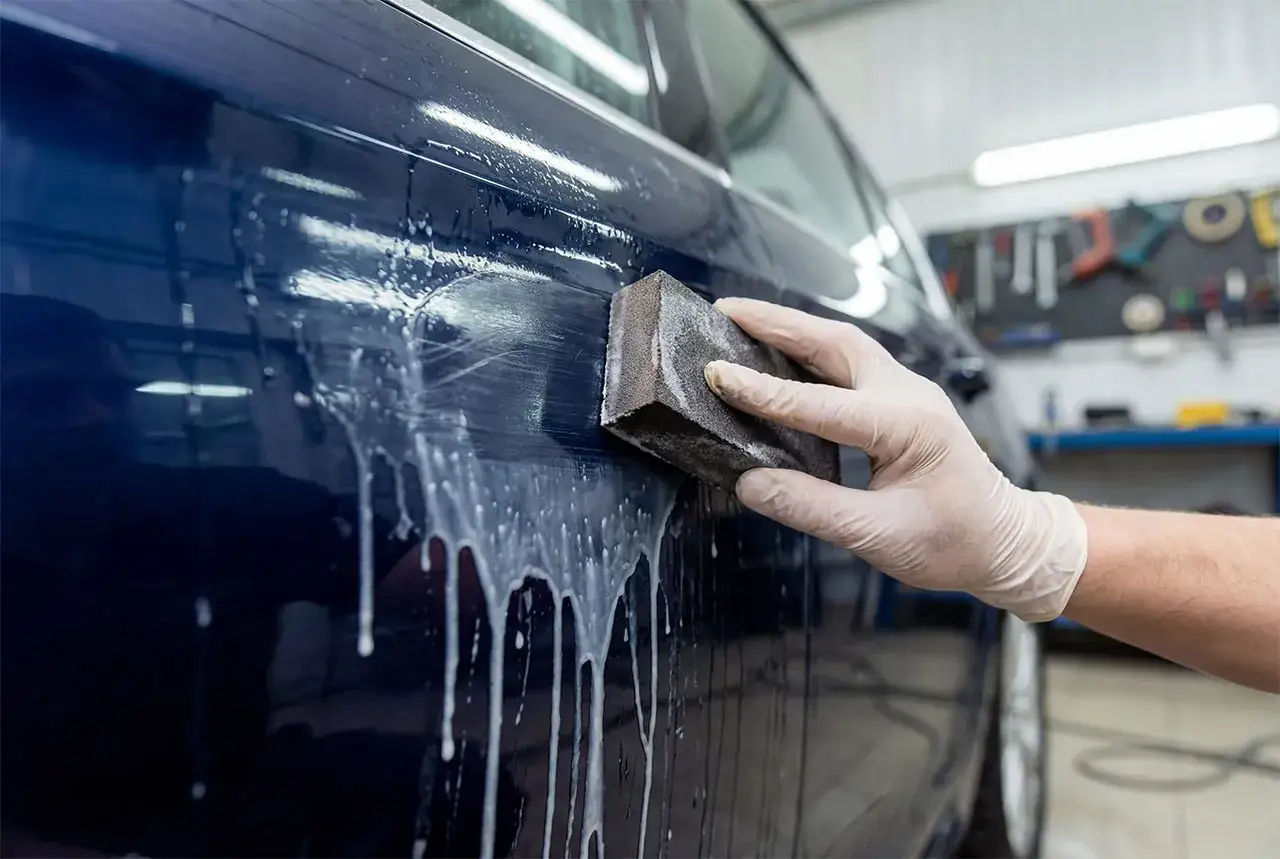
Wet sand only when the defect calls for it. Use it for isolated runs, stubborn orange peel, or a marked area that needs leveling. I would usually begin around 2000-grit on a soft block, then refine with 3000-grit or finer before polishing. Keep the surface wet, keep the pressure light, and stop the moment the defect is levelled.
-
Refine and protect. After correction, remove any polishing residue, then add a sealant or ceramic spray. That final layer does not repair the clear coat, but it slows down the same damage that made the finish look tired in the first place.
If you are unsure at any step, stop and re-evaluate. The biggest mistake I see is people treating wet sanding like a generic fix when it is really a precision step. That is why the next question is not just how to polish, but which tools are actually worth trusting.
Which tools and products are worth paying for
You do not need a warehouse full of gear, but you do need the right few items. A decent tool choice makes the difference between a clean correction and a hazy finish that looks better only in bad light.
| Tool or product | What I use it for | Why it matters |
|---|---|---|
| Dual-action polisher | General correction and finishing | Safer than a rotary and more than enough for most clear coat restoration jobs |
| Foam finishing pad | Refining haze and restoring gloss | Leaves a cleaner finish after compounding |
| Microfibre cutting pad | Heavier swirls and stubborn oxidation | More aggressive, so it removes defects faster but also increases risk |
| Compound | Removing deeper defects and sanding marks | Necessary for serious correction, but too harsh for the final step |
| Finishing polish | Restoring clarity after compounding | Brings back the depth that a compound can dull |
| Panel wipe or IPA-based cleaner | Checking the true finish after polishing | Removes oils that can hide defects and fool you into thinking the job is done |
| Sealant or ceramic spray | Short- to medium-term protection | Helps the finish survive UK weather, salt, and frequent washing |
I would still choose a dual-action machine over a rotary for almost every owner. A rotary is faster, but it is less forgiving and can burn through thin lacquer on edges before you realise what has happened. If the clear coat is already fragile, you want control more than speed. That becomes even more important once you decide whether the damage can be polished away at all.
When polishing is enough and when you need paintwork
Polishing works when the clear coat is still there. That sounds obvious, but it is where a lot of DIY jobs go wrong. If the lacquer is intact but tired, polishing can remove oxidation, reduce micro-marring, and bring back a surprising amount of depth. If the finish has peeled, cracked, or broken through to base coat, polish has nothing solid to work with.
Here is the practical rule I use: if the mark is shallow, stable, and only affecting the top surface, I try correction first. If the area is lifting, soft, or visibly missing lacquer, I stop and think about paint repair instead.
- Polish only for swirls, haze, fine oxidation, and very light scratches.
- Wet sand plus polish for a small run, nib, or a specific area that needs levelling.
- Respray or smart repair for peeling edges, cracked lacquer, large faded patches, or exposed colour coat.
One thing I would not do is keep chasing perfection on a panel that is already thin. Clear coat may be thinner than people expect, especially on edges and on newer repairs, so every extra pass increases the risk. The honest decision here saves money later, which leads directly to the question most owners ask next: what does all this cost in the UK?
What restoration costs in the UK
At current UK rates, the price spread is wide because the work ranges from basic DIY maintenance to full repainting. The cheapest option is not always the best value, especially if it only hides the problem for a few weeks. I would rather pay for a real correction once than for three cosmetic shortcuts.
| Option | Typical cost | What you get | My take |
|---|---|---|---|
| DIY wash, decon, polish, and protection | About £40 to £150 | Good for light oxidation, swirls, and dullness | Best value if the clear coat is still healthy |
| Single-stage machine polish by a detailer | About £150 to £400 | Noticeable gloss improvement and correction of moderate defects | Strong option for daily drivers that need a proper refresh |
| Two-stage correction with protection | About £300 to £700 | More defect removal and a cleaner finish on darker paints | Worth it if the car matters to you and the paint is in rough shape |
| Single-panel lacquer repair or respray | About £200 to £500+ | Proper repair for failing localised clear coat | Usually the right answer once peeling starts |
| Full respray | About £2,000 to £4,000+ | Reset for badly tired or widespread paint failure | Expensive, but sometimes the only honest solution |
Vehicle size, metallic paint, masking time, and panel shape all push the price around. If a quote sounds unusually cheap, ask exactly what is included. A quick machine pass, no decontamination, and no protection is not the same thing as a proper clear coat restoration. Once the finish is back, the job still is not finished unless you protect it from the same damage that caused the fade in the first place.
How to keep the finish from failing again
Restoration only pays off if you change the habits that wore the surface down. In the UK, that usually means winter salt, motorway grime, soft road film, and frequent machine washing. None of those alone destroys clear coat overnight, but together they age it faster than owners expect.
- Wash with a gentle shampoo and a clean mitt instead of using harsh brushes.
- Dry the car with quality microfibre towels or a filtered air blower so water marks do not sit on the finish.
- Top up protection with a sealant or ceramic spray every few months if the car is not coated.
- Remove bird droppings, sap, and bug splatter quickly because they can etch the surface.
- Park under cover when you can, especially if the car lives outside through summer and winter.
- Inspect bonnet edges, roof rails, and the top of the boot because those areas usually fail first.
If you have already corrected the paint, this part matters more than the polish itself. Good aftercare keeps the gloss alive, while poor washing brings back the swirls almost immediately. That is why I always finish by choosing the repair route based on the actual condition of the panel, not on how much I want the problem to go away.
The route I would choose for each level of damage
For dull but intact clear coat, I would wash, decontaminate, machine polish, and protect. For light scratches and hazy panels, I would still start with a test spot before moving up in aggressiveness. For peeling or cracked lacquer, I would stop polishing, because no amount of compound can rebuild missing paint.
The honest rule is simple: restore what is still bonded, repair what is merely marked, and repaint what is failing. That is the cleanest way to save time, avoid burn-through, and get a finish that actually lasts instead of one that only looks good for a week.