Knowing how to polish a car with a buffer is mostly about control: the right machine, the right pad, clean paint, and a slow enough technique to improve gloss without creating new defects. In this guide, I cover the setup I would use on a UK daily driver, the steps I follow on each panel, and the mistakes that shorten clear coat life. I also show where polishing stops and protection starts, because those two jobs are often confused.
What matters before you start
- A dual-action polisher is the safest choice for most home detailers, while a rotary cuts faster but generates more heat.
- Wash, decontaminate, and tape the car first, because polishing dirt or grit into the paint creates fresh marring.
- Work in small sections, keep the pad flat, and let overlapping passes do the correction.
- Use the least aggressive pad and polish that removes the defect, then step up only if the test spot still looks tired.
- Polishing improves gloss and removes light swirls, but it will not safely erase every deep scratch.
- Finish with a sealant, wax, or coating so the result lasts longer on UK roads and in wet weather.
Choose the right machine and pad combination
For most readers, I would start with a dual-action polisher. It oscillates while it spins, so it corrects paint with far less heat than a rotary buffer, which matters when you are still learning how the panel reacts. A rotary can be brilliant in experienced hands, but it is not where I would send a beginner.
Machine choice
| Type | Best for | Risk level | My take |
|---|---|---|---|
| Dual-action polisher | Light to moderate correction, swirl removal, gloss enhancement | Low | The best first buy for most UK owners |
| Rotary polisher | Heavier correction, oxidised paint, more demanding paint systems | High | Use only if you understand heat control and paint thickness |
| Forced-rotation DA | Faster correction with more control than a rotary | Medium | Good for advanced users, but unnecessary for a first machine |
Read Also: Dish Soap for Car Wash? The Truth & Safe Alternatives
Pad choice
- Cutting pad - aggressive enough for heavier swirls, oxidation, and dull paint that needs real correction.
- Polishing pad - the workhorse choice for refining paint after a light cutting step or for mild defects.
- Finishing pad - the safest option for soft paint, final gloss work, and jewelling the finish.
- Microfibre or wool - faster cut than foam, but they finish more aggressively, so I only use them when foam is not enough.
For a first machine, I like a 125 mm backing plate, variable speed, a soft start, and enough cord length to move around the car without fighting the cable. A 600 W-ish DA is usually plenty for home work, and a 5-inch pad gives you a better balance of control and coverage than a larger setup. Once the machine and pad match the job, the next step is preparing a surface worth polishing.
Prepare the paint properly before you switch the machine on
Polishing starts before the pad touches the paint. I never skip prep, because a fast polish on dirty paint just turns contamination into a sanding step. If the surface is not clean and smooth now, the machine will simply spread the problem around.
- Wash the car thoroughly. A proper two-bucket wash is ideal, but whatever method you use, the goal is the same: remove loose dirt before you start correction.
- Dry the paint completely. Water hiding in panel gaps or around trim can fling onto the pad and ruin the pass.
- Run the baggie test. If the paint feels rough through a plastic bag over your hand, it needs decontamination before polishing.
- Clay the surface if needed. This removes bonded contamination that washing cannot shift, and it makes the pad move more evenly.
- Mask trim, badges, rubber seals, and sharp body lines. Polishes can stain plastic and you do not want the machine riding those edges.
- Inspect under strong light and choose a test spot. I usually pick a small, representative panel section before I touch the rest of the car.
On an average hatchback, the prep stage usually takes 45 to 90 minutes if the paint is only lightly contaminated, or 2 hours plus if claying and masking are involved. That time is not wasted. Clean paint lets the machine work evenly and keeps you from chasing defects that were never in the clear coat in the first place. Once the panel is ready, the actual polishing becomes much more predictable.

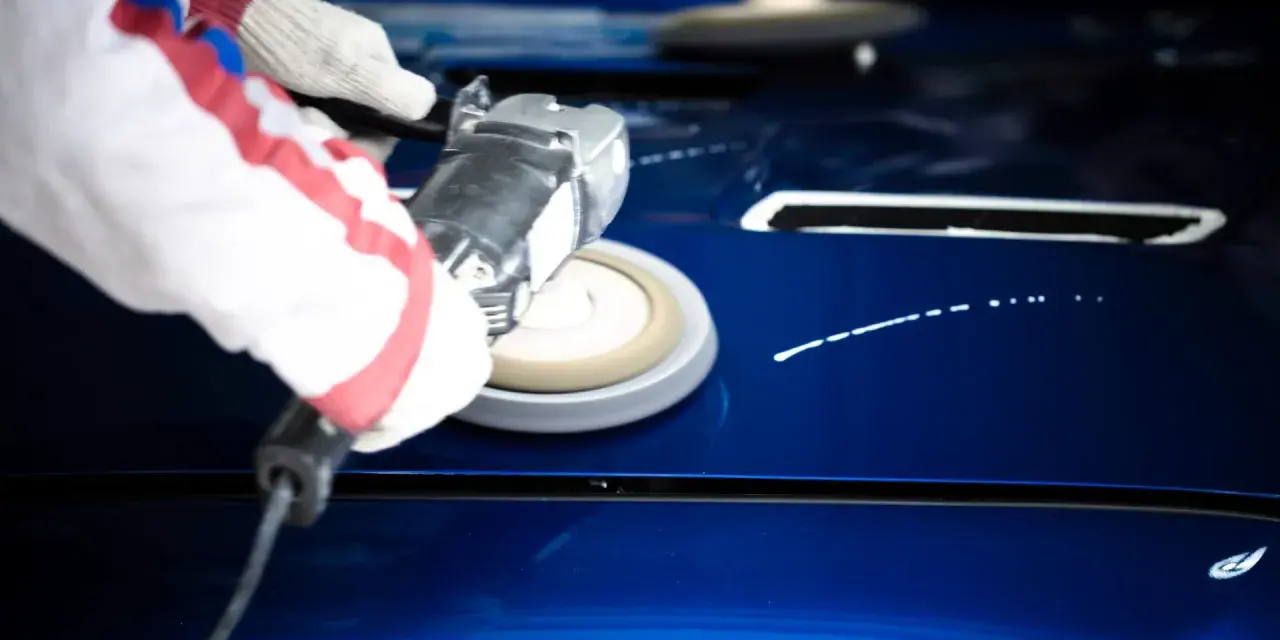
Polish in small sections and keep the pad moving
This is the part most people rush. I prefer to treat polishing as controlled refinement, not scrubbing. The polish should do the cutting, while the machine simply keeps it moving across the surface in a consistent pattern.
- Prime the pad with 4 to 5 small drops of product. A lightly primed pad cuts more evenly and reduces dry spots on the first pass.
- Place the pad on the paint before starting the machine. That simple habit keeps product from flinging across the panel.
- Start at a low speed to spread the polish, then move to the working speed recommended by the machine and product. For many DA polishers, that means a low setting first, then a moderate working range rather than maximum speed.
- Work in a 50 x 50 cm area, or roughly 2 x 2 ft. Smaller sections give you better control and more consistent results.
- Use slow, overlapping passes in a crosshatch pattern. I move left to right, then up to down, with enough overlap that no strip is left untouched.
- Keep the pad flat. If it starts to hop, drag, or feel sticky, lighten the pressure and check whether the pad is loaded with spent polish.
- Wipe the residue with a clean microfiber towel and inspect under light before moving on. If the finish looks better but not quite there, do a refinement pass rather than forcing more pressure.
- Clean the pad after every panel or two. A clogged pad cuts poorly, creates more dust, and makes the finish less predictable.
I usually tell people that the machine is only as good as the section discipline behind it. A soft pad and light polish can remove a lot more than expected if you let them work properly. If the paint is soft, one careful finishing pass may be enough. If the test spot still looks swirled or flat, the paint is telling you to step up the pad or product, not to lean harder on the machine. That judgement call matters more than raw power.
Read the paint instead of forcing a single pass
Not every panel responds the same way. Soft black paint can haze quickly, harder clear coats can take more effort, and older single-stage finishes often behave differently again. I treat the first test spot as a diagnostic pass, not a final answer.
| What you see | What it usually means | What I would do next |
|---|---|---|
| Swirls are lighter but still visible | The combo has enough gloss but not enough cut | Step up one level in pad or polish aggression |
| Haze appears after correction | The panel needs a finishing pass | Switch to a softer pad and a lighter polish |
| Residue dries too fast | Section too large, panel too hot, or too much pressure | Work smaller, use less product, and slow the machine down |
| Pad feels grabby or unusually warm | The pad is loaded or the paint is getting hot | Clean the pad and let the panel cool before continuing |
There is one rule I use every time: if a scratch catches a fingernail, I assume it is too deep for safe polishing and leave it alone or plan a proper paint repair. Machine polishing is excellent for light defects and clarity loss, but it is not a miracle cure for clear coat damage. That is why experience is mostly about knowing when to stop, not how hard to push.
Avoid the mistakes that damage clear coat or waste your time
- Polishing a dirty car. Even tiny grit can create fresh marring and undo the work you just did.
- Using a pad that is too aggressive for a light defect. Starting mild saves paint and often gives a better finish.
- Tilting the pad onto edges or body lines. Those areas are where clear coat is thinnest.
- Running the machine dry or drowning the pad in product. Either extreme makes correction less consistent.
- Staying in one spot too long. Even a DA builds heat if you sit on a panel and keep hammering it.
- Skipping trim masking. Polishes can stain textured plastic and rubber, and the cleanup is annoying.
- Working in direct sun on a hot panel. Product flashes too quickly and the paint becomes harder to read.
I also see people over-correct one door and under-correct the rest because they never compare results in the same light. Step back often, look across the car, and keep your eye on consistency rather than chasing a perfect patch that does not match the surrounding panels. Once those habits are in place, the last step is locking the finish in.
Protect the finish so the work lasts
Polishing removes a thin layer of material, so protection should follow immediately. On a UK daily driver, I prefer a durable synthetic sealant or a ceramic spray after polishing because rain, road salt, and frequent washing wear bare paint faster than most owners expect. If the car is a garage queen, wax can still make sense, but it is not the longest-lasting option.
| Protection type | Typical durability | Best for |
|---|---|---|
| Carnauba wax | About 4 to 8 weeks | Warm gloss, weekend cars, easy application |
| Synthetic sealant | About 3 to 6 months | Daily drivers that need longer protection |
| Ceramic spray sealant | About 3 to 6 months | Quick application with stronger water behaviour |
| Paint coating | 1 year to 5 years plus, product dependent | Owners who want longer durability and are prepared for stricter prep |
If you go straight from polishing to protection, use a clean panel wipe if the sealant or coating calls for it. If it does not, follow the product instructions instead of adding extra steps that might interfere with bonding. The goal is simple: keep the gloss you just created from disappearing after the first wet week. That makes the time spent polishing much more worthwhile.
What a sensible UK setup costs in 2026
You do not need a pro workshop budget to get a strong result at home, but I would avoid the absolute cheapest machine unless you are only tidying a small car once in a while. A practical first-time setup usually lands somewhere between £120 and £300, depending on how much of the kit you already own.
| Setup | Typical budget | What you usually get |
|---|---|---|
| Entry-level starter kit | £60 to £120 | Basic dual-action machine, one or two pads, limited polish choice |
| Balanced DIY kit | £120 to £250 | Better DA polisher, three pad grades, compound, polish, tape, microfibres |
| Serious enthusiast kit | £250 to £500 plus | Higher-quality machine, more pads, lighting, prep products, sealant or coating support |
If I were setting up from scratch, I would spend more on the polisher and pads than on a huge pile of boutique products. A reliable machine, two or three good pads, a proper polish, masking tape, and quality towels will do more for the result than a shelf full of extras. Once the budget is set, the final question is how I would actually approach the car on a Saturday morning.
The routine I would use on a normal daily driver
I would wash and decontaminate first, tape the vulnerable areas, and do one test spot before touching the rest of the car. If the finish improves with a light pad and polish, I would keep that combination and work panel by panel. If it needs more bite, I would step up gradually rather than jumping straight to an aggressive setup.
- Start with the least aggressive combination that can solve the defect.
- Work in small, repeatable sections so the result stays even.
- Inspect in good light after every panel, not just at the end.
- Stop when gloss is strong and the remaining defects are minor rather than chasing perfection into the clear coat.
That is the approach I trust on most UK cars: measured, safe, and focused on improving the finish without creating a repair job for later. When the paint is thin, badly scratched, or already over-polished, a lighter enhancement plus proper protection is usually the smarter answer than trying to force a dramatic correction.