Waxing is one of the simplest ways to keep paint looking richer, cleaner, and better protected from road film, rain, and UV. This guide explains how to wax a car properly, from surface preparation and product choice to application technique, removal, and reapplication timing. I’ll keep it practical, because the difference between a glossy finish and a streaky one usually comes down to preparation and patience.
What matters most before you start
- Wash, dry, and decontaminate the paint first, or the wax will seal in dirt and roughness.
- Apply wax thinly to cool panels, working one small section at a time.
- Thin coats win; more product usually means more residue, not more protection.
- Paste and liquid waxes usually last longer than spray wax, which is better as a top-up.
- Use clean microfibre towels and turn them often to avoid haze and micromarring.
- Reapply when water stops beading cleanly, which is often every 2-4 months for traditional wax.
Why wax still matters on modern paint
Wax protects; it does not repair. That is the first thing I remind people. It adds a sacrificial layer over clean paint, helping to repel water, grime, bird droppings, UV, and winter road salt, which is especially relevant on UK roads for much of the year. As Autoglym notes, polishing restores while waxing protects.
That protection is not just about chemistry. A fresh wax layer makes the surface feel slick, so dirt does not hang on as aggressively and the next wash is usually easier. If the paint is already dull, oxidised, or covered in swirls, wax will not hide the problem. It will often make it more obvious, which is why I treat waxing as the final step after any correction work.
Once you understand what wax can and cannot do, the next question is simple: how do you prepare the paint so the finish actually looks clean?
Get the surface ready before you open the tin
Start with a proper wash using car shampoo, not washing-up liquid. You want the paint clean, dry, and free of loose grit before any protection goes on. If the surface still feels rough after washing, that is bonded contamination, not dirt you can rinse away.
- Wash from top to bottom and rinse thoroughly.
- Dry with a clean microfibre towel or blower, including mirrors, badges, and panel edges.
- Run your fingertips over the paint. If it still feels gritty, use a clay bar or synthetic clay mitt to remove bonded fallout, tar specks, and road film.
- Work in shade and on cool panels so the wax does not flash dry or smear.
- Mask delicate trim if your product is known to stain plastics.
If the car has matte or satin paint, do not treat it like a normal gloss finish. Standard wax can change the appearance, so follow the paint supplier’s instructions instead. The same caution applies if the car has just been repaired or resprayed, because the finish may need specific care.
When the paint is clean enough to protect, the application itself becomes much easier and much less frustrating.
The application rhythm that gives an even finish
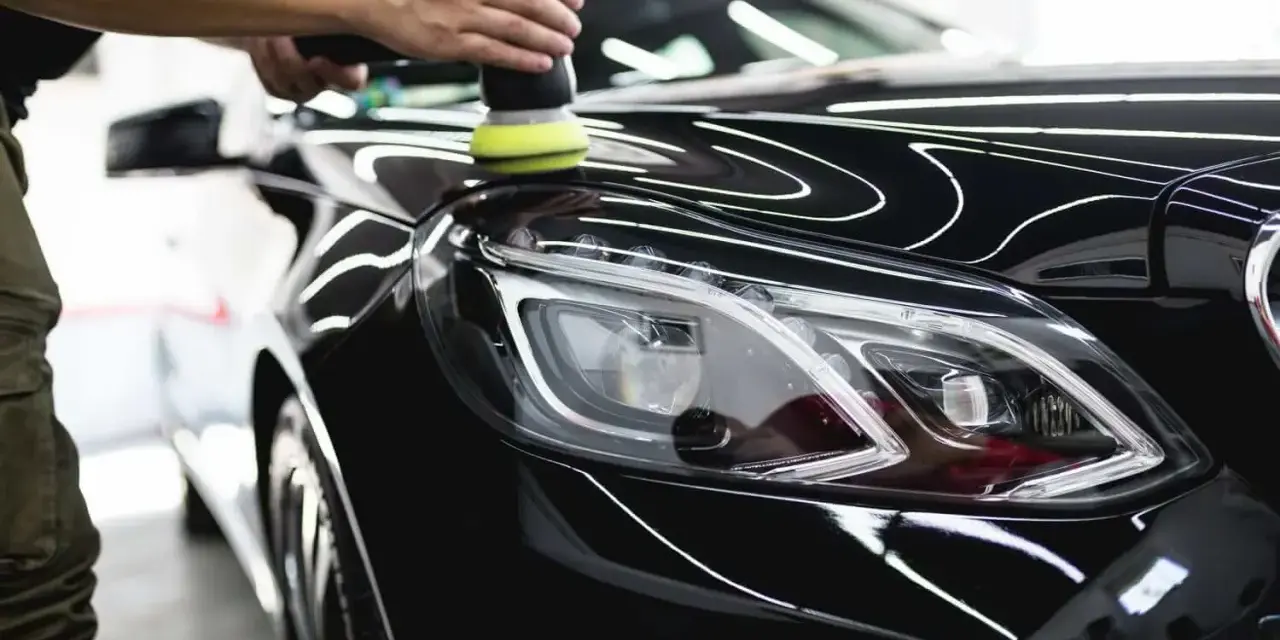
I usually start on the roof and bonnet, then move to the upper doors and work down the car. That keeps me from leaning across freshly finished panels and makes it easier to see what I have already covered. For most cars, I prefer hand application because it gives more control, especially around badges, edges, and tight panel gaps. A dual-action machine can speed things up on bigger vehicles, but it is not required for a clean result.
- Use a soft foam or microfibre applicator pad and load it lightly. For most products, two or three small pea-sized dabs are enough for a door or half-bonnet section.
- Spread the wax in overlapping passes. Straight lines are easier to control than random swirls, and they make coverage easier to see.
- Keep the coat very thin. If you can clearly see white buildup, there is too much product on the surface.
- Let the wax haze if it is a traditional paste or liquid wax. The haze is the dull film that tells you it is ready to come off.
- Buff with a clean, dry microfibre towel using light pressure. I keep at least two towels to hand, because the first one loads up quickly.
- Inspect the panel from different angles. Leftover residue usually shows up around badges, in creases, and on dark paint.
Spray wax works differently. You normally apply it to a panel and wipe it while the product is still fresh, which makes it quicker but less forgiving if you overapply. Either way, the goal is the same: a thin, even layer that comes off cleanly.
Once you have the motion right, the bigger decision becomes which type of wax actually fits the job.
Choose the wax that fits the job
Liquid or paste wax usually gives the best protection. That is the practical split I use most often, and Meguiar's makes the same distinction. Spray wax is better when you are short on time or want a quick booster between fuller details, while traditional paste still has a place when appearance matters most.
| Wax type | Best for | Typical durability | Effort | Main trade-off |
|---|---|---|---|---|
| Paste wax | Maximum gloss on a well-kept car | Usually the longest of the classic waxes | Higher | Takes more time to apply and remove |
| Liquid wax | Balanced weekend detailing | Good | Medium | Less tactile than paste, though often easier to spread |
| Spray wax | Quick protection after a wash | Shortest of the three | Low | Needs topping up more often |
| Synthetic or ceramic wax | Drivers who want easier maintenance and stronger water behaviour | Often longer-lasting than natural wax | Medium | Can feel less warm in appearance than carnauba-rich products |
If I were preparing a family hatchback for everyday use, I would usually choose a synthetic or durable liquid wax. If I were detailing a weekend car for a sale, a show, or just personal satisfaction, a good paste wax still has real appeal because the finish can look deeper. For a quick top-up after a wash, spray wax is the practical option, not the hero product.
That product choice matters because most bad waxing jobs are not caused by the wax itself. They come from avoidable mistakes.
The mistakes that cause streaks and wasted effort
The problems I see most often are simple and predictable: too much product, the wrong temperature, dirty towels, and poor prep. The table below covers the ones that matter most.
| Mistake | What it causes | Better move |
|---|---|---|
| Applying wax too thickly | Smearing, stubborn residue, wasted product | Use a thin coat and build coverage, not thickness |
| Waxing in direct sun or on hot panels | Flash drying, streaks, patchy removal | Wait for shade and cool paint |
| Skipping the wash or clay stage | Sealed-in contamination and a rough finish | Clean the paint properly before protection |
| Using a dirty towel | Micro-marring and cloudy residue | Start with fresh microfibre and flip it often |
| Letting residue sit too long | Hard buffing and uneven shine | Remove the product within the label’s working window |
More wax does not mean more protection. It usually means more wiping. A thin, even coat protects just as well and is much easier to finish cleanly. If anything, restraint is what makes the result look professional.
After that, the last thing to get right is timing, because wax does not last forever, especially on a daily driver in UK weather.
How often to reapply in UK weather
There is no single interval that fits every car. Mileage, where the car is parked, how harsh your wash routine is, and the product you chose all change the answer. As a rough rule, a traditional wax often lasts about 2-4 months, while spray wax is better treated as a top-up every 2-4 weeks or after a wash if you want to keep the beading sharp.
For UK use, I think in seasons as much as in weeks. Autumn and winter are the hardest months because road salt, slush, and constant wet driving strip protection faster. If the car lives outside, I would be checking beading more often and planning a fresh layer before the coldest stretch. If it is garage-kept and only used lightly, you can usually stretch the interval without losing much.
Watch the water behaviour. When beads become flat, lazy, or patchy, the wax is fading. Reapply after a proper wash rather than trying to patch over dirty paint. That keeps the next layer bonded to clean paint and gives you the best chance of a lasting finish.
With the timing sorted, the final gains come from a few small habits that keep the finish looking freshly waxed for longer.
The small habits that keep the finish looking freshly waxed
After waxing, I keep the car looking the part by washing with a gentle shampoo and drying it before water spots have time to settle. If I am hand-washing, I use the two-bucket method, one bucket for shampoo and one for rinsing the mitt, because it keeps grit out of the wash process and helps the wax last longer.I also like a light spray wax topper after a clean wash every few weeks. It is not a replacement for a proper wax, but it keeps the surface slick and buys time between full applications. That matters on a daily-driven car, because the more consistently you maintain the finish, the less dramatic each full detail has to be.
If you keep the prep honest, the layer thin, and the towels clean, waxing stops feeling like a chore. It becomes one of the easiest ways to keep paintwork easier to wash, better protected, and visibly cared for, which is exactly what most drivers want from exterior detailing.