Wrapping a car is mostly a materials problem: if the film, prep products, and application tools are right, the job becomes far more manageable. The practical answer to what do I need to wrap my car is not a giant mystery kit, but a sensible mix of vinyl, cleaning supplies, cutting tools, heat, and a clean space to work in. I’m going to break that down in plain English so you can buy only what actually matters and avoid the usual DIY mistakes.
The short version of what you need before you start
- Cast vinyl wrap film is the safest choice for most full and partial car wraps because it conforms better than cheap calendared film.
- Surface prep matters more than most beginners expect: wash, decontaminate, dry, and wipe down properly before any film touches the paint.
- A heat gun, squeegee, and knifeless tape form the core of a workable DIY toolkit.
- Microfibre cloths, panel wipe, and clay bar help remove dirt, wax, and bonded contamination that would ruin adhesion.
- Plan for extras such as primer, edge sealer, masking tape, magnets, and a thermometer if the wrap has deep recesses or tricky edges.
- A clean indoor workspace is not optional if you want a finish that looks professional rather than hurried.
The materials that make or break the job
The wrap itself is only one part of the setup. In practice, I think of a wrap job as a stack of small decisions that either help the film bond cleanly or create problems you only notice later, when an edge lifts or a seam starts showing dust.
| Material | Why you need it | My view |
|---|---|---|
| Vinyl wrap film | This is the actual colour or finish that covers the vehicle. | Essential. For full wraps, choose cast film with good conformability. |
| Microfibre cloths | Used for washing, drying, and final wipe-downs without leaving lint. | Essential. Buy more than you think you need and keep them clean. |
| Panel wipe or prep cleaner | Removes polish, grease, fingerprints, and residue before application. | Essential. This is where most DIY jobs gain or lose adhesion. |
| Clay bar | Lifts bonded contamination like tar mist, brake dust, and road film. | Strongly recommended. Especially on used paint or daily drivers. |
| Squeegee with felt edge | Helps press the film down and push air out without scratching the face. | Essential. A hard edge alone is a bad idea on visible finishes. |
| Heat gun | Softens the vinyl so it can conform to curves, corners, and recesses. | Essential. Also needed for post-heating stretched sections. |
| Knifeless tape or fresh blades | Lets you cut the film cleanly without dragging a blade across paint. | Essential. Knifeless tape is worth it on long visible cuts. |
| Masking tape and magnets | Used to position film before you commit to the panel. | Helpful. Not glamorous, but very useful on large panels. |
| Primer or adhesion promoter | Improves grip on stubborn edges, badges, and deep channels. | Optional. Only use it where the film maker or installer experience justifies it. |
| Infrared thermometer | Checks whether stretched areas have been post-heated properly. | Very useful. It takes the guesswork out of finishing. |
| Nitrile gloves and safety glasses | Protects your hands and keeps skin oils off the adhesive side. | Practical, not fancy. Clean hands matter more than people think. |
If I had to narrow this down to the absolute basics, I would start with film, cleaner, cloths, a good squeegee, a heat gun, and cutting control. Once you have those in place, the next question is whether the car is actually ready for the film.
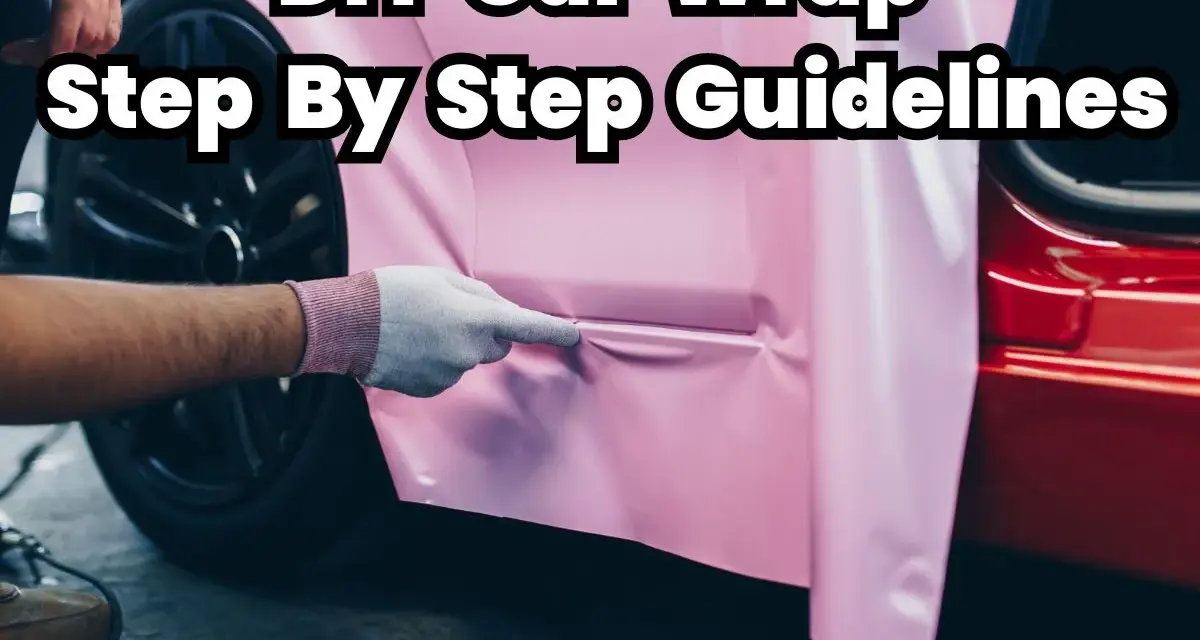
How I prep the car before any vinyl goes near it
Prep is the part of the job that nobody brags about, but it is usually the part that decides whether the wrap survives the first winter. A wrap will not hide contamination, wax, or bad paint; it will usually make those problems more visible.
According to 3M, a clean, dry indoor environment in roughly the 10°C to 38°C range is the right place to work, and that matches what I see in practice: warmth helps, but damp air and dust kill patience fast. I want the vehicle spotless, fully dry, and at a stable temperature before I begin.
- Wash the car thoroughly and remove loose dirt first.
- Decontaminate the paint with a clay bar if the surface feels rough.
- Remove tar, sap, polish residue, and old wax from all wrap-adjacent areas.
- Dry the car completely, including panel gaps, seals, mirrors, and badges.
- Use panel wipe or the cleaner recommended by the film maker for final prep.
- Wait for fresh paint to cure fully before wrapping it.
Two things matter more than beginners expect. First, the wrap will telegraph defects, so scratches, dents, and heavy orange peel can still show through. Second, the less time there is between cleaning a panel and applying film to that panel, the better the result usually is. Once the surface is ready, the tool choice starts to matter in a much bigger way.
The tools I would not start without
There are plenty of gadget-heavy wrap kits on the market, but most of them are padded with things you do not actually need. I would rather have a smaller set of reliable tools than a drawer full of plastic extras that make the job slower and dirtier.
Application tools
- Felt-edge squeegee for laying down the film without scarring the face.
- Wrap glove if you want smoother handling over curves and a bit less friction.
- Magnets or low-tack tape to hold larger sheets in position while you align them.
Cutting tools
- Precision knife with fresh blades for trimming once the film is safely positioned.
- Knifeless tape for clean edges on long panels, bumpers, and risky cuts near paint.
- Scissors or shears for rough sizing before the film goes on the panel.
Read Also: How to Wax a Car Properly - Get a Flawless, Protected Finish
Heat and finishing tools
- Heat gun to soften the vinyl so it can follow the body lines.
- Infrared thermometer to confirm post-heat temperature instead of guessing.
- Soft finishing cloths for rechecking edges and removing fingerprints.
I also prefer to work dry unless the film manufacturer explicitly says otherwise. Wet application is not the default for modern colour-change films, and using the wrong slip solution can make alignment unpredictable. The tool set is important, but the film itself still decides how forgiving the wrap will be.
Choosing the right vinyl for a full or partial wrap
This is where a lot of DIY plans go sideways. People buy a film because the colour looks good, then discover it is too stiff for the curves on their bumper or too thin to survive repeated repositioning.
| Film type | Best for | Pros | Trade-off |
|---|---|---|---|
| Cast vinyl | Full wraps, colour changes, curved panels, mirrors, bumpers | More conformable, better around body lines, usually easier to finish neatly | Costs more than cheap alternatives |
| Calendared vinyl | Flat or lightly curved surfaces, short-term graphics | Cheaper and easy to source | Less forgiving on complex vehicle shapes |
| Gloss, satin, matte, metallic, pearlescent | Appearance choice | Lets you match the look you actually want | Some finishes show handling marks or surface defects more easily |
If I were wrapping a whole car, I would almost always choose cast film with an air-release adhesive. Air-release simply means the adhesive has channels that help trapped air escape during application, which makes alignment easier and reduces the chance of bubbles. On larger jobs, that forgiveness is worth paying for.
Avery Dennison also advises keeping material from the same batch on one job, which matters more than most people realise on metallic or pearlescent finishes. Even slight variation between rolls can become visible once panels sit side by side, so I always check batch consistency before I cut anything.
That still leaves one practical issue: buying enough material without overspending, which is where a lot of DIY projects either get underplanned or wildly overbought.
What a realistic UK shopping budget looks like
The film itself is the largest cost, but the support items add up quickly if you are starting from zero. In the UK, you can build a basic but usable toolkit without spending a fortune, although the total moves up fast once you add a quality heat gun and knifeless tape.
| Item | Typical UK budget | Notes |
|---|---|---|
| Felt squeegee and basic hand tools | £5-£25 | Cheap individually, but worth buying decent versions once. |
| Heat gun | £60-£150 | Mid-range tools are usually easier to control than the absolute cheapest units. |
| Knifeless tape | About £45 for a 50 m roll | Often the smartest spend on a first wrap. |
| Microfibre cloths, cleaner, clay bar | £15-£50 | These are consumables, not one-time purchases. |
| Primer or adhesion promoter | £20-£80 | Only needed on certain edges or difficult areas. |
| Full DIY tool kit, excluding film | £100-£250 | A sensible range if you are buying the right tools instead of the cheapest ones. |
For a first-time job, I would treat that range as the cost of being properly equipped, not as a luxury spend. If you already own a good heat gun and a few detailing basics, your extra outlay can be much lower. Once the budget is clear, the last step is deciding what I would actually buy first if I were starting from scratch.
The kit I would buy first if I were starting from scratch
If I were putting together a first wrap order, I would keep it brutally simple and buy in this order.
- Cast wrap film in the correct finish and enough length for the vehicle, with a little margin for errors.
- Microfibre cloths, wash solution, panel wipe, and clay bar so the paint is genuinely clean before installation.
- Felt-edge squeegee and a spare hard squeegee for control on both flat and contoured areas.
- Heat gun with enough control to warm the film without cooking it.
- Knifeless tape plus fresh blades so I can choose the safer cutting method on each panel.
- Nitrile gloves, masking tape, and magnets to keep the process clean and manageable.
- Infrared thermometer if the wrap has any stretched sections, deep curves, or finish-sensitive areas.
- Primer or edge sealer only if the film, panel shape, or installer experience really calls for it.
If you are still deciding how ambitious to be, start with a roof, bonnet, or mirror set before committing to a full respray-style colour change. That smaller job teaches you how the film behaves without wasting a complete roll, and it gives you a much better feel for whether a full wrap is realistic in your space. In my experience, the best-looking wraps are usually the ones that were planned patiently, not the ones that relied on a giant universal kit and optimism.