What matters most before you start
- Use a jump box on a 12V starter battery; it gives the engine enough current to crank, but it does not repair a failing battery.
- Connect red to positive and black to an earth point or the approved negative terminal, depending on the vehicle handbook.
- Keep the pack stable, away from belts, fans, hot parts and loose clothing.
- Crank the engine in short bursts, then stop if it will not start after a few attempts.
- Once the engine catches, disconnect in reverse order and drive long enough for the alternator to put charge back into the battery.
What a jump box does and when it makes sense
A jump box is a self-contained battery booster that supplies the burst of power a starter motor needs to turn the engine over. I treat it as a rescue tool, not a charger and not a cure for every no-start problem. If the fault is a flat or weak 12V battery, it is usually the quickest way back on the road; if the fault is mechanical, electrical or fuel-related, it will not solve the issue.
| Situation | Use the jump box? | What it usually means |
|---|---|---|
| Lights left on overnight | Yes | The battery is discharged, but the car may still start normally once boosted. |
| Slow cranking on a cold morning | Usually | The battery may be low or tired, especially in winter. |
| Battery is swollen, cracked or leaking | No | That is a safety issue; do not try to force a start. |
| Engine turns over strongly but will not fire | Maybe not | The problem may be fuel, ignition, sensors or immobiliser-related. |
| Hybrid, plug-in hybrid or 24V commercial vehicle | Only if the handbook says so | The system may need a different procedure or a different rated pack. |
That distinction matters because a jump starter can hide the real fault for one journey and leave you stranded again the next morning. Once you know the tool is appropriate, the next step is checking the vehicle and the pack before you connect anything.
Check the car and pack before you touch the clamps
I always spend a minute on preparation, because most mistakes happen before the engine even starts. Open the bonnet, make sure the vehicle is in Park or Neutral, apply the handbrake, and switch off lights, heaters, infotainment and any chargers. If the battery is hidden in the boot or under a seat, look for the manufacturer’s jump points under the bonnet rather than forcing access to the battery itself.
- Check that the jump starter is charged enough for the job.
- Inspect the clamps and cables for cracked insulation, corrosion or loose jaws.
- Look at the battery casing for swelling, cracks, leaks or a strong sulphur smell.
- Find the positive terminal or the designated positive jump point before attaching anything.
- Check the handbook if the car has stop-start technology, an AGM or EFB battery, or any special jump-start instructions.
- Clear the area so the pack will sit flat and cannot fall into the engine bay.
On many modern UK cars, especially those with battery management systems, the safest connection point is the one the manufacturer designed for boosting. That is why I prefer the handbook over guesswork every time. With the basics clear, the connection order is the part that matters most.
Connect the clamps in the right order
The order of the clamps is not a detail to skim over. I keep the sequence deliberate: red first, then black, then the pack on, then the engine start. If your unit has a ready light, an audible warning or a boost mode, follow the manual for that specific model rather than assuming every pack behaves the same way.
- Place the jump box on a flat, dry surface where it cannot slide or tip.
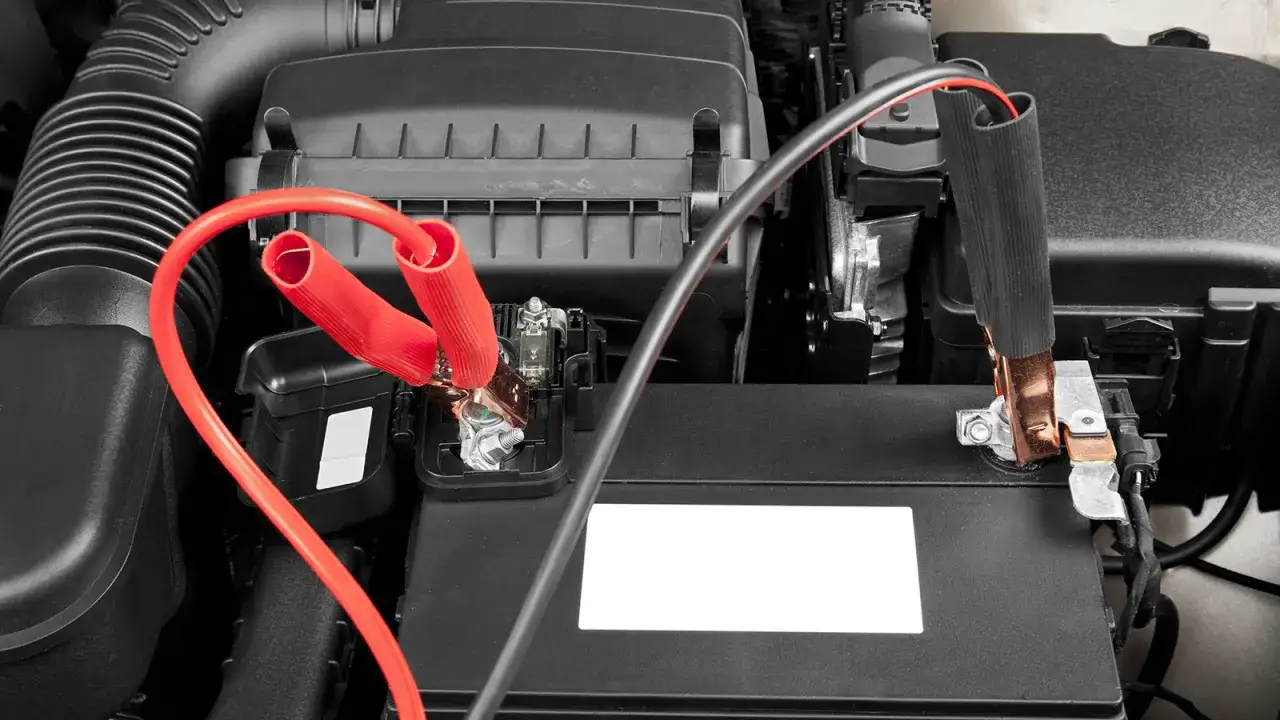
- Attach the red clamp to the positive (+) terminal or positive jump point.
- Attach the black clamp to a clean, unpainted metal earth point on the engine or chassis, or to the approved negative terminal if the handbook allows it.
- Make sure the clamps do not touch each other, the battery casing or any moving parts.
- Switch the jump starter on, or wait for its ready indicator if the model powers up automatically.
- Start the engine in one short attempt, usually no longer than about 5 seconds.
- If it does not fire, stop, wait about 30 seconds, and try again once or twice more before reassessing the fault.
I avoid long cranking sessions because they stress both the starter motor and the pack. If the jump box warns about reverse polarity or poor connection, stop immediately and re-check the clamps rather than trying to force it. Once the engine catches, the job is not finished yet, because the battery still needs time to recover.
After the engine starts, give the battery a chance to recover
As soon as the engine is running smoothly, disconnect the clamps in reverse order, starting with the black clamp and then the red. Some packs ask you to switch them off first; I follow the pack’s own instructions here rather than trying to be clever. Once everything is stowed, let the engine run and take a proper drive if you can, because that gives the alternator a better chance to put charge back into the battery than a short idle in the driveway.
- Do not switch the engine off straight away unless you have no choice.
- Keep electrical loads modest for the first few minutes if possible.
- A 20 to 30 minute drive is more useful than a brief stop-start shuffle around a car park.
- If the car stalls again almost immediately, the battery may be too weak to hold charge or the charging system may be failing.
I also avoid revving the engine hard straight after a jump start. Modern charging systems do not need that, and it does not make up for a tired battery. If the car behaves normally for the rest of the journey, that is a good sign, but it is still worth asking why the battery went flat in the first place.
The mistakes that usually cause trouble
Most failed jump-start attempts come from a handful of avoidable errors. The good news is that they are easy to prevent once you know what to watch for.
- Reversing polarity by putting red on negative or black on positive. Even a brief mix-up can damage the pack or the car.
- Using the wrong earthing point or a rusty, painted surface. A poor connection often looks fine but behaves badly.
- Cranking for too long. Short attempts are safer, and the pack will usually tell you when it needs a pause.
- Letting the clamps touch or rest against moving parts in the engine bay.
- Jumping a visibly damaged battery with cracks, swelling or leakage.
- Assuming every no-start is a flat battery. If the engine spins but will not fire, the problem may be elsewhere.
Those mistakes are not dramatic on paper, but they are exactly the ones that turn a simple five-minute job into a blown fuse, a dead pack or a call to roadside assistance. If something feels wrong during the process, I stop and inspect rather than pushing on blindly.
When the jump box is not the real fix
A jump box is brilliant at one job: giving the starter system a temporary boost. It is much less useful when the real fault lies in the battery itself, the alternator, the starter motor or the vehicle electronics. If the battery goes flat again after a short drive, the battery warning light stays on, or the car needs a jump every few days, I treat that as a diagnosis problem, not a boost problem.
- If the battery is older and keeps losing charge, it may be near the end of its life.
- If you get repeated clicking with a fully charged pack, the starter or wiring may be the issue.
- If the battery smells strongly of sulphur or looks swollen, stop using it.
- If the vehicle is a hybrid, plug-in hybrid or 24V commercial vehicle, use the correct manufacturer-approved method.
- If the car cranks normally but will not fire, look beyond the battery and check fuel, ignition or immobiliser faults.
At that point, a garage or roadside technician is usually cheaper than repeated failed starts and repeated battery abuse. I prefer to think of the jump starter as a first response, not a substitute for fixing the underlying problem. If the battery issue keeps returning, something in the charging system deserves attention.
Keep the pack ready for the next cold morning
A jump starter only earns its place in the boot if it is ready when you need it. I recharge mine after every use and give it a top-up every couple of months, especially before winter. Cold weather is hard on batteries, so a pack that looked fine in summer can be disappointingly weak when the temperature drops.
- Recharge the unit after each jump start.
- Check the charge level every 2 to 3 months, even if you have not used it.
- Inspect the clamps, cable insulation and casing for damage.
- Store it in a dry place and avoid leaving it neglected in extreme heat or cold for long periods.
- Keep the manual with the unit so you are not guessing under pressure.
A jump box works best when it is charged, used on the right fault and connected with a calm, repeatable routine. If you keep that habit, the tool earns its place in the boot long before the next cold morning arrives.