This guide explains how to wrap a truck without wasting material, trapping dirt, or chasing bubbles across large panels. I focus on the prep, the install sequence, the tools that actually matter, and the finishing steps that make the wrap last in real UK conditions. If you get those parts right, the job becomes much more predictable and far less frustrating.
The decisions that make a truck wrap last
- Use cast vinyl for the main panels; it conforms better on doors, arches, mirrors, and recesses.
- Work indoors at a stable temperature, ideally around 18-23°C, with clean, dry panels.
- Prep is not optional: wash, decontaminate, degrease, and fix any paint defects before the film goes on.
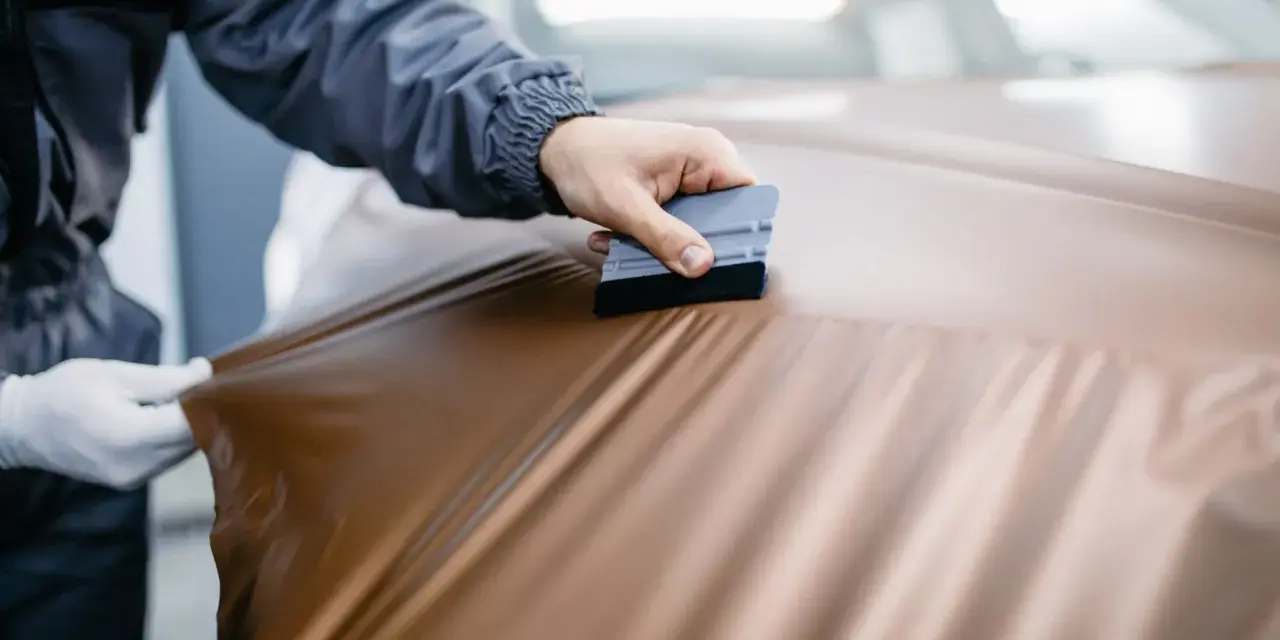
- Most of the install is controlled placement, not force; align first, then squeegee with even pressure.
- Curves and recesses need proper post-heating, usually around 90-100°C depending on the film.
- After installation, wait at least 72 hours before washing, and longer if the weather is cold.
Choose the right film and workspace
Cast vinyl is the safe default for a truck because it handles curves, badges, and deeper body lines far better than cheaper calendared film. On a large vehicle, that extra conformability is not a luxury. It is what keeps the wrap from looking tight on the flat sections but visibly strained around mirrors, arches, and door shuts.
I also care just as much about the room as the roll. A clean, dry indoor bay makes the difference between a controlled install and one long battle with dust, static, and cold panels. For most modern cast films, I aim to keep the surface and air in the 18-23°C range. Once you drift towards 16°C, the film gets less forgiving and the adhesive behaves more slowly.
| Item | What I use it for | Why it matters |
|---|---|---|
| Cast vinyl film | Main wrap material | Conforms better on curves and recesses than cheap film |
| Heat gun and infrared thermometer | Softening and post-heating | Stops guesswork when the film has to be locked into shape |
| Felt-edge squeegee | Pressing film onto the panel | Reduces scratches and helps move air out cleanly |
| Knifeless tape | Trimming lines | Cleaner edges and less risk to paint than freehand blade work |
| Microfibre cloths and IPA | Final cleaning | Removes residue that would show under the film |
| Magnets and low-tack tape | Positioning | Lets you line up large panels before you commit |
If I had to cut the budget anywhere, I would cut decorative extras before I cut film quality. On a truck, the film and the environment are what decide whether the wrap looks professional on day one and still looks straight six months later. Once those basics are sorted, the prep becomes the next critical step.
Prep the truck like the finish depends on it
It does. Most failed wraps start with bad prep, not bad film. Dust under the film, wax left around trim, or paint that was already failing will show through quickly, and once the vinyl is down, those problems do not disappear.
- Wash the vehicle thoroughly with a pH-neutral shampoo and rinse all residue away.
- Remove bonded contamination if the paint feels gritty, then dry every panel completely.
- Wipe the surfaces with IPA on a lint-free microfibre cloth to remove polish, oils, and silicone.
- Remove badges, handles, lamp surrounds, number plates, and any trim that would leave awkward edges.
- Inspect for chips, rust, lifting lacquer, old repairs, and fresh paint that has not fully cured.
- Dry seams, mirror bases, shut lines, and panel edges with a clean towel or compressed air.
I never wrap over rust, peeling clear coat, or soft paint. If a panel fails a simple tape test, I stop there and fix the surface first. On freshly painted trucks, I always check the cure time with the bodyshop rather than guessing. That small pause is usually cheaper than replacing a section of film because the paint underneath started to move.
Once the truck is clean enough to trust, the actual installation becomes a process instead of a gamble.
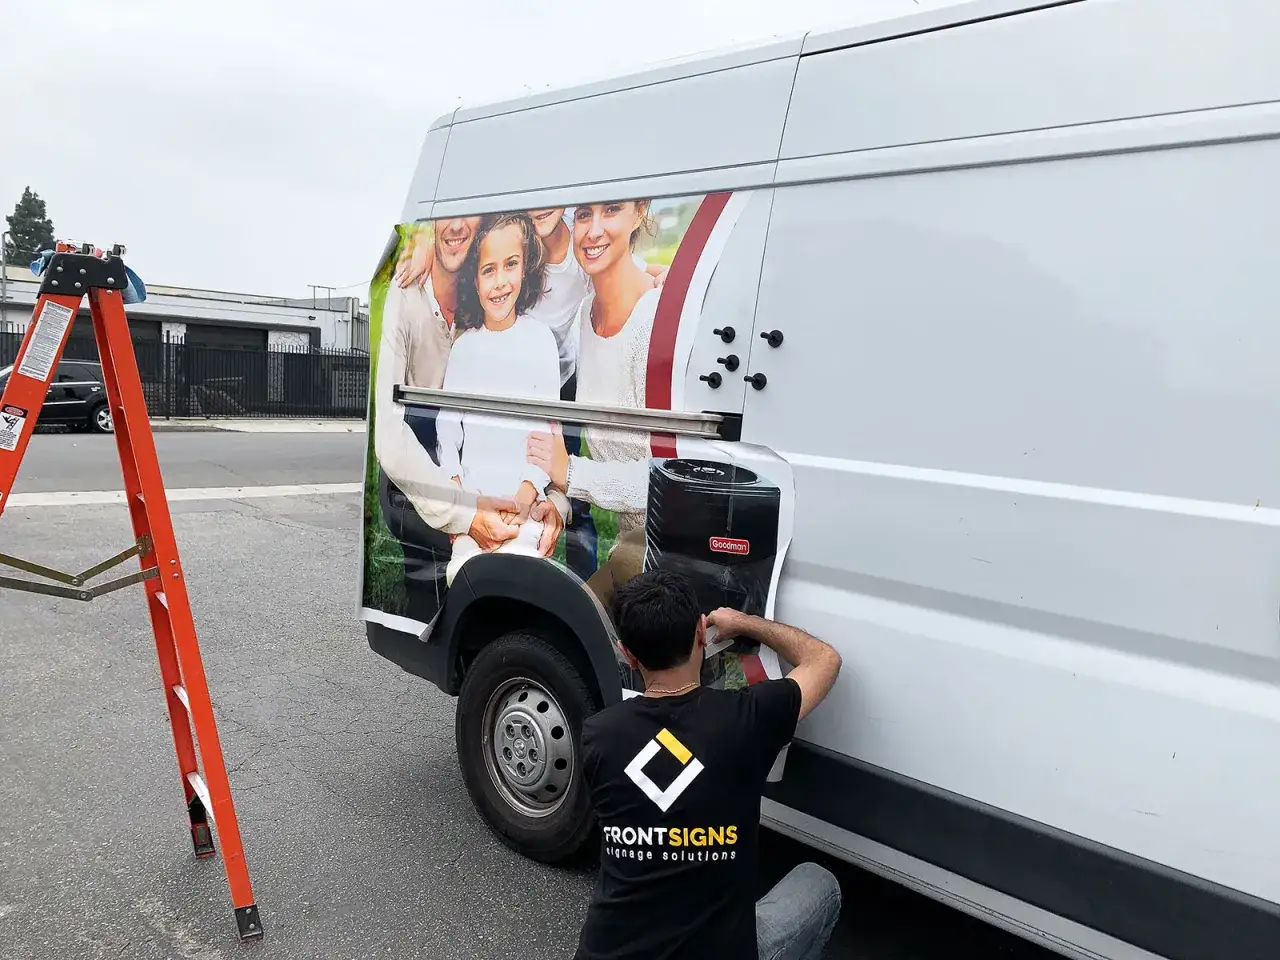
Lay the film panel by panel
For most truck wraps, I prefer a dry install. It gives me cleaner control, less mess, and a better sense of where the film is sitting before the adhesive really starts to bite. The mistake I see most often is trying to fix alignment too late. Once a long panel is half committed, small errors become expensive ones.
- Measure each panel and cut the film with enough extra to cover the edges comfortably.
- Position the film with magnets or low-tack tape before peeling the liner.
- Create a centre hinge, then expose only one section of adhesive at a time.
- Tack the film lightly in place, check the alignment, and only then begin squeegeeing.
- Work from the centre outward with overlapping strokes so air has somewhere to escape.
- Keep the tension even. Let the film slide and settle instead of pulling it hard across the panel.
- Re-lift early if the alignment drifts. Fixing it now is easy; fixing it after full adhesion is not.
The term air-release channels comes up a lot here. It simply means tiny pathways in the adhesive that help trapped air escape during application. They are useful, but they are not a licence to rush the job. Good technique still matters more than any adhesive technology.
On longer side panels, I also like to check the grain or finish direction before I commit. That matters on brushed, textured, or printed films where a panel can look subtly wrong even if the alignment is technically correct. From here, the job gets more technical because the curved parts of a truck reveal every mistake.
Handle curves, recesses, and edges correctly
Deep recesses, bumper corners, mirror caps, and wheel-arch shapes are where beginners usually over-stretch the film. When the vinyl is pulled too hard, it can thin out, lose visual depth, or start lifting later at the edge. That is why I treat these areas with patience rather than force.
- Warm the film just enough to relax it, not enough to make it floppy.
- Lay deep recesses from the deepest point outward, then work the sides and finally the centre.
- Use relief cuts sparingly and only where the film and panel layout genuinely need them.
- Use knifeless tape whenever you can. It gives you a cleaner edge and keeps a blade away from paint.
- Post-heat stretched and recessed areas to the manufacturer’s spec, commonly around 90-100°C for many cast films.
- Re-squeegee critical areas after heating, because warm film can reveal tiny lifts that were not visible before.
If the wrap has a protective top layer, I remove it before post-heating so I am not hiding the surface I actually need to finish. Once the technical corners are under control, the next question is whether the project still makes financial sense.
Budget the job and know when DIY stops making sense
In the UK, professional vehicle wrapping prices move quickly with size, complexity, and finish. As a broad benchmark, 3M UK puts a typical car wrap at £1,800-£5,000, and pickup or light commercial truck work usually sits at the higher end of that range or above it once the panels get bigger and the trim work becomes more involved.
| Scenario | Typical UK range | My practical read |
|---|---|---|
| Professional full wrap on a pickup or light truck | £1,800-£5,000+ | Reasonable for a clean colour change or simple branding on a standard vehicle |
| Larger commercial truck or complex livery | £3,500-£8,000+ | More material, more trimming, more labour, and more risk of rework |
| DIY materials and consumables | £300-£900+ | Can be cheaper on paper, but waste and mistakes eat the savings fast |
A careful first-time DIY install is rarely a one-day job. For a pickup, I would expect a long weekend at minimum, and more if the truck has a roof, mirrors, arches, and badges that all need to come off cleanly. Professional installers work faster because they are not learning the film at the same time as they are fitting it.
- You have deep recesses, rivets, or corrugated panels.
- The truck is too tall to work safely without proper access equipment.
- The paint is marginal, freshly repaired, or already starting to fail.
- The design needs perfect alignment across multiple panels.
- You need the vehicle back in service quickly.
At that point, paying for a wrap shop is usually cheaper than redoing a bonnet twice. Even so, a perfect install can still be damaged by rushed aftercare, which is why the first week matters more than most owners realise.
Protect the finish through the first week
The wrap is not finished the moment the last edge is trimmed. The adhesive still needs time to settle, and the first wash can undo a neat install if you rush it. In colder UK weather, I am even more conservative because the film and adhesive both settle more slowly.
- Keep the truck indoors or under cover for as long as possible after installation.
- Avoid washing for at least 72 hours, and I prefer a full week if the weather is cold.
- Hand wash with a neutral shampoo and a soft mitt.
- Skip brush car washes and harsh alkaline or acidic cleaners.
- If you use a pressure washer, keep the nozzle moving, use a wide fan, and stay well back from the edges.
- Check for lifting around mirrors, handles, badges, and wheel arches after the first wash.
- If the finish is satin or matte, clean it more often but even more gently, because grime shows sooner and builds up faster.
If you want extra protection, choose a wrap-safe sealant or coating rather than a product loaded with abrasives or heavy wax. That keeps the surface easier to clean without changing the look of the film. I would also wait about a week before applying wax or anything similar, because early polishing can interfere with adhesion around edges.
If I were handing the truck back to myself, I would inspect every seam in daylight before calling the job done. Extra time at the start, patience on the curves, and a gentle first wash do more for durability than any shortcut ever will.